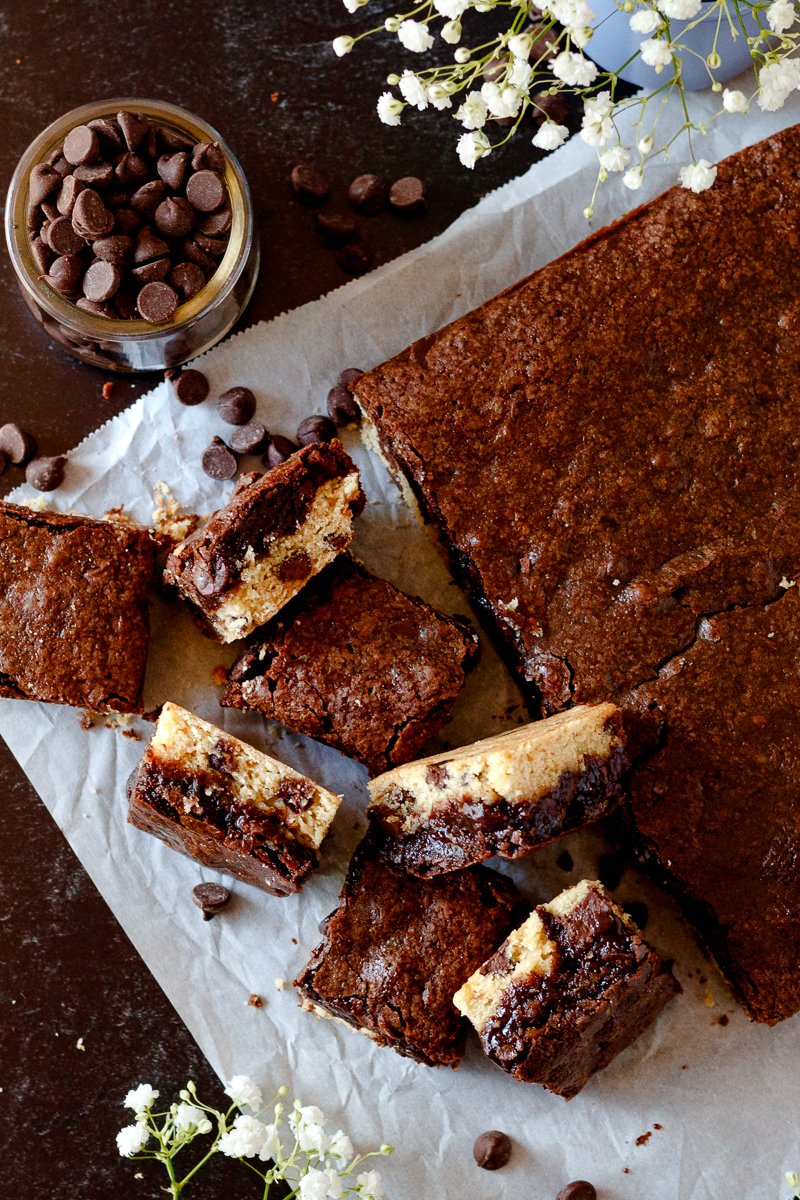
When you can’t choose between baking cookies or brownies – make both! With a chocolate chip cookie base and a brownie layer on top, these easy brookie bars are a perfect dessert for indecisive bakers!


Darlings, this is not the time to choose between desserts. It is, on the other hand, a great time to find recipes that are straightforward, delicious, and preferably loaded with chocolate. These easy brookie bars check all the boxes!
What are brookie bars?
In case you missed it, brookies, a cross between a chocolate chip cookie and a brownie in cookie form, were all the rage a few years back.
Williams-Sonoma was selling box mixes, bakeries included these treats in window displays and home bakers worked to perfect recipes.

Well, not this home baker. I love you all dearly, and do love some pretty involved recipes. But I was not going to fuss with making half cookie half brownie cookies. No thanks.
That is, not until this year, when I couldn’t choose between baking cookie bars or brownies. Instead of choosing, I made both. At the same time. And there was no unnecessary fussing about getting ratios in a single cookie correct.
Which, in my opinion, means that the best way to make brookies is in bar form. Simplicity is beautiful, darlings.
How do these taste?
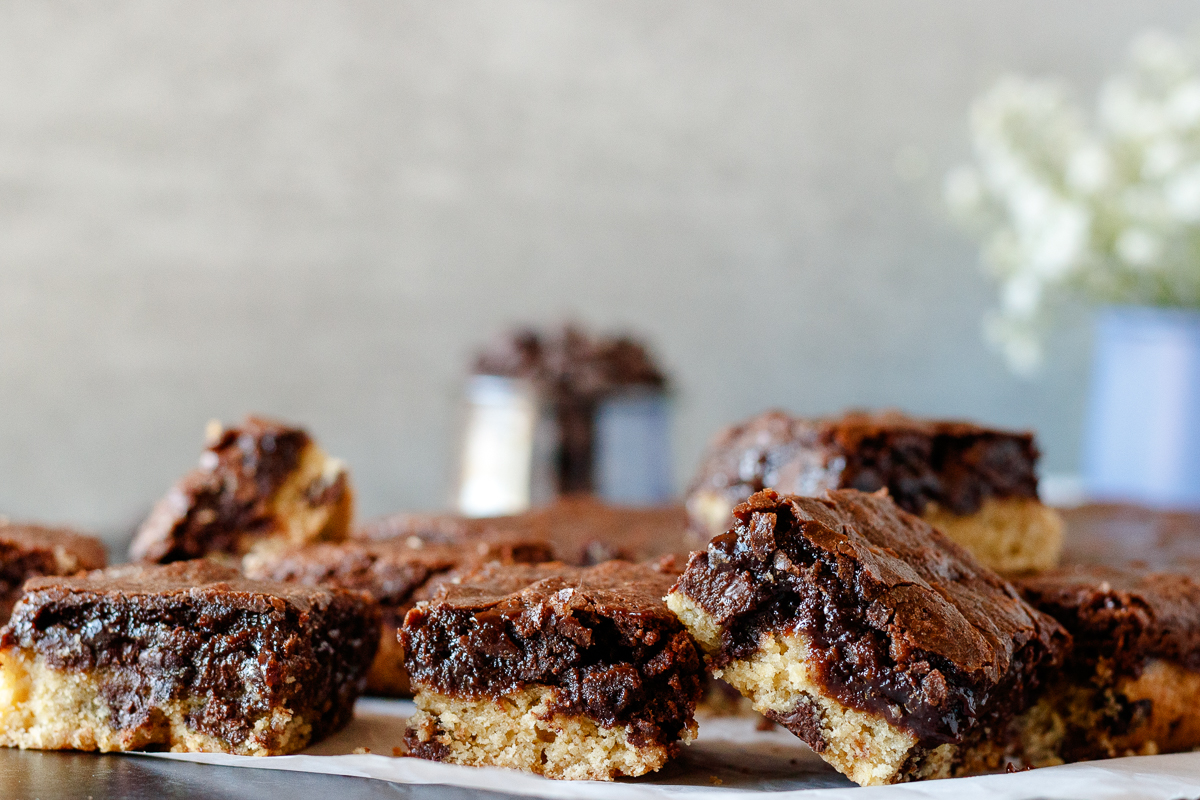
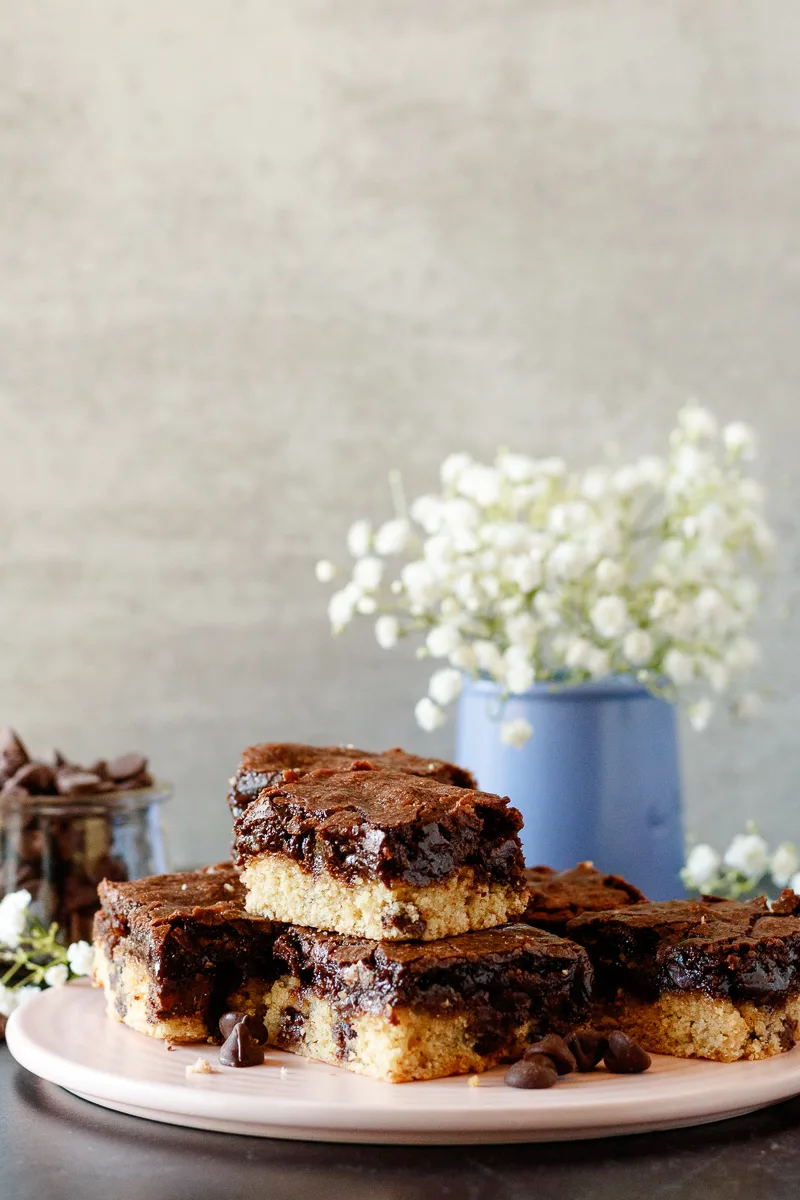
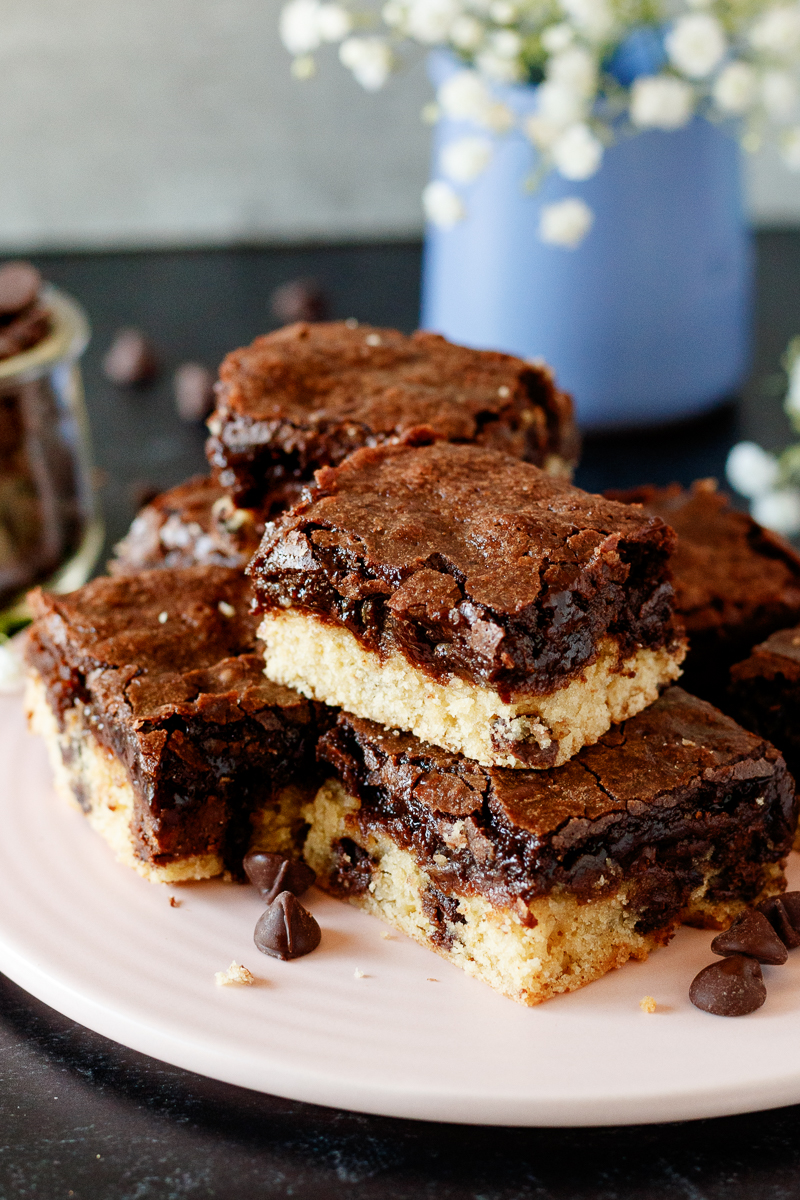
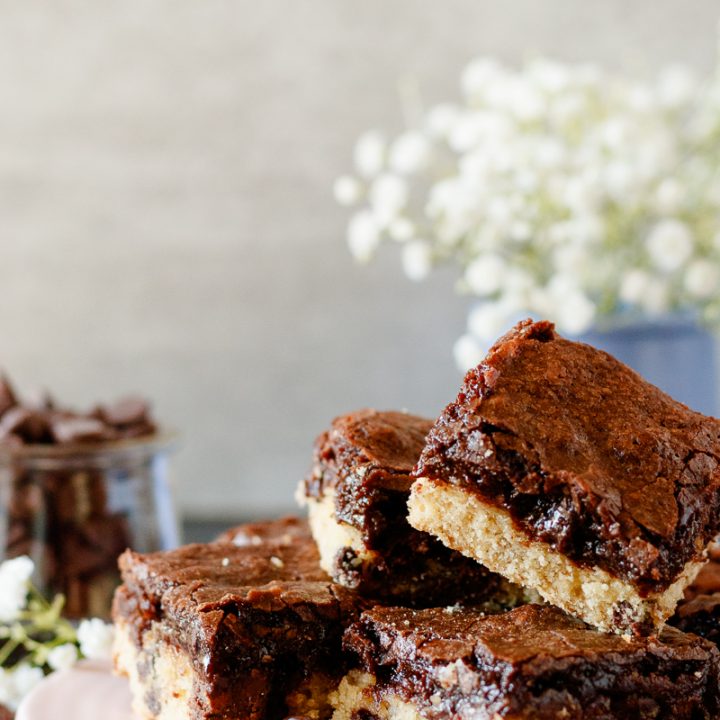
Definitely a recipe for chocolate lovers, these brookie bars are rich and chocolatey!
You get a bit of the classic chewy vanilla and chocolate combo from the chocolate chips, and then the brownie layer gets you with an extra dose of rich chocolate.
My kids alternated between eating these as one would a brownie and trying to bite each layer individually. The choice is up to you!
A few recipe variations…
To keep these simple, I opted for an easy cookie recipe and a one-bowl brownie recipe for each layer. You can make these brookie bars by hand, and I think that’s part of the magic.
If you would like to change up the flavor profile a little, I’d like to share a few options.
The first is omitting the chocolate chips from the cookie layer. This will tone down the chocolate flavor just a bit and give you a more pronounced vanilla and chocolate layer.

Another option is adding some spices! Taking a cue from my earl grey skillet cookie, tea is great. Another good option is cinnamon. Add a teaspoon to your cookie layer for a warming flavor and cinnamon brookies!
Third, add your favorite nut butter! This can be added to either layer. But personally, I recommend adding it as a swirl to the brownie layer. First, because that’s the easiest way to do it. Second, presentation! We eat with the eyes first, darlings.
Recipe notes for easy brookie bars…
These bars are a great make-ahead dessert! The flavors are better and the bars are easier to cut the day after baking. Not that it’s ever stopped us from cutting into them once they’re cool, of course.
You can store brookie bars up to 3 days in an airtight container at room temperature. Or store for a week in the refrigerator.
But the best thing? These are freezer friendly! This recipe makes a full 9×13-inch pan. My family is not that big, and there’s usually a variety of dessert in the house. So when we bake these, I wrap and freeze a portion for later.
To freeze, you have two options. First, wrap and freeze a large chunk to be thawed and cut into portions later. OR, my favorite, individually wrap portions in plastic wrap. Place the individually wrapped cookie bars into a freezer bag, and grab 1 or 2 as needed!
I don’t even wait for them to thaw. We microwave them for a few seconds to thaw so they’re warm. This is one of the BEST bases for ice cream sundaes because it’s both a cookie and brownie sundae! Top with a little caramel sauce and it’s heavenly!

I hope you love this recipe, darlings. Happy baking!

Easy Brookie Bars (Brownie Cookie Bars)
When you can't choose between baking cookies or brownies - make both! With a chocolate chip cookie base and a brownie layer on top, these easy brookie bars are a perfect dessert for indecisive bakers!
Ingredients
Cookie Layer:
- 8 tablespoons unsalted butter, melted
- 2/3 cup packed brown sugar
- 1 teaspoon vanilla extract
- 2 large eggs
- 2 cups all-purpose flour
- 1 1/2 teaspoons baking powder
- 1/2 teaspoon kosher salt
- 1 1/2 cups chocolate chips
Brownie Layer:
- 3/4 cup unsweetened cocoa powder
- 3/4 cup neutral-flavored oil (applesauce or pumpkin purée can be used as substitutes for all or part of the oil)
- 3 eggs (see notes for making an egg-free version)
- 1 1/4 cups granulated sugar
- 1 tsp vanilla extract
- 1/4 tsp salt
- 3/4 cup all-purpose flour
- 1 cup chocolate chips
Instructions
- Preheat your oven to 350 F. Butter or nonstick spray a 9x13-inch casserole dish and line with parchment paper. Set aside.
- Prepare the cookie layer: In a large mixing bowl, or the bowl of a stand mixer fitted with the paddle attachment, combine the melted butter and brown sugar.
- Whisk in the eggs and vanilla, stirring well to combine.
- In 2 batches, add the flour, baking powder, and salt. Stir in the chocolate chips once there are only a few small streaks of flour left.
- Using a spatula, the bottom of a flat cup, or food-safe gloved hands, press the cookie layer evenly into your prepared pan. Set aside.
- Wipe your bowl (should be pretty clean), and prepare the brownie layer.
- In your mixing bowl, stir together the sugar, cocoa powder, salt, oil, eggs, and vanilla.
- Sprinkle the flour over the top of the batter and stir until just combined. When you still have a few white streaks, stir in the chocolate chips.
- Once the streaks disappear, pour the batter into the prepared pan and spread it over the cookie layer.
- Bake the brookie bars for 30-35 minutes until a tester comes out mostly clean. The center if the brownie layer might look slightly under-done, but it will set as the bars cool, as brownies do.
- Allow the bars to cool at least 2 hours before slicing. If possible, allow them to rest at room temperature overnight (cover once cool).
- Slice your brookie bars and serve! They are delicious at room temperature, or slightly warmed in the microwave for a few seconds.
- Extra bars can be stored in an airtight container for 3 days, refrigerated in an airtight container for a week, or individually wrapped and frozen in an airtight container for up to 2 months.
Notes
- Feel free to get creative with this recipe! Omit the chocolate chips in the cookie layer for a greater vanilla/chocolate contrast. Add cinnamon, tea, or other spices to either layer for a unique twist. Or, top the brownies with a swirl of nut butter, caramel, or any of your favorite brownie toppings.
- During baking, keep an eye on the bars. If you bake them too long, they can become tough. You want the edges to look set and the center to still look a little under-done, but not raw.
- If you'd like to make an egg-free and dairy-free version, you can substitute dairy-free butter sticks in the recipe and use dairy-free chocolate chips. Flax eggs make a good substitute for the cookie layer as they provide structure. Applesauce or extra oil can be used for the brownie layer as an egg replacement.
Recommended Products
As an Amazon Associate and member of other affiliate programs, I earn from qualifying purchases.


