
*NOTE: This is the first of a three-part series on roasting a whole pig with La Caja China (a pig roasting box). The first part will cover the design and construction of a custom-made Caja China. The second part will cover the basics of sourcing, processing, and handling of the ideal pig for your roast. Finally, the third part will cover the day-of roasting activities, including what to do after the roast…enjoy!*


Roasting pigs has been a tradition for me since I was a boy growing up in Miami. My parents are from Cuba, so every Christmas season, my dad and I would go to the local slaughterhouse to find our pig. We’d prepare it and roast it in our backyard with a makeshift pit on the ground made of cinder blocks. This took a lot of time and work, but everyone would rave at just how amazing the pork tasted late at night on Christmas Eve while my brother and I eagerly waited for midnight to unwrap presents.
Pig Roasting Pit vs. Pig Roasting Box
The cinder block pit is a tried-and-true method of roasting a whole pig. It’s easy and cheap, but roasting takes almost a whole day. As an adult, I never really had the time (or the space in my backyard) to roast a whole pig with a cinder block pit. While my dad relied on the cinder block pit to roast whole pigs, other Cuban-American families in South Florida used another device: La Caja China.

You don’t have to be fluent in Spanish to know that it translates to The Chinese Box. The name doesn’t really matter here. What matters is that this type of roaster will have a whole pig done in four hours! Explaining this concept to people will initially be met with skepticism, but they become quick converts when they taste the end result.
A Brief History of La Caja China
The legend behind La Caja China is that the design was originally introduced by Chinese laborers in Cuba who were building Cuba’s railroads. The design caught the attention of local Cubans, who made the design their own. Ultimately, this box became part of their cultural heritage that was introduced to the United States in the 20th century. Interestingly enough, the Cajuns are known to use a roaster that appears similar to the La Caja China for roasting suckling pig (cochon de lait).
There are many online vendors that sell their version of La Caja China, but they’re not cheap! Some smaller models start at about $400. If you want to add accessories and tools, that’s extra. And that’s not to mention the cost of buying/processing the pig itself. By the time you add all those expenses, you may have spent about $1,000 before you start roasting the pig.
How to build your own pig roaster and save money…
Being the type of guy I am, I figured it would be best if I simply made my own design for La Caja China. I did my research online for plans, and decided to construct my own custom version inspired by a design found here.

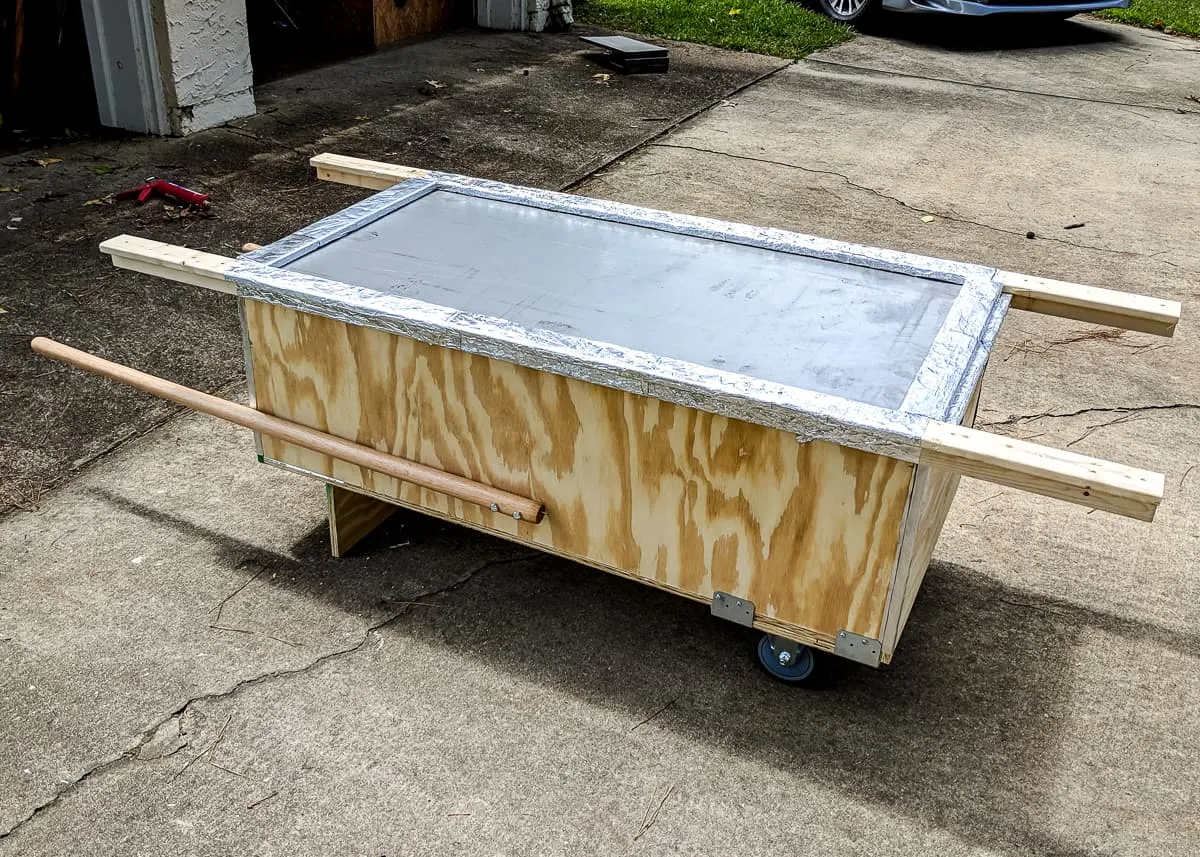
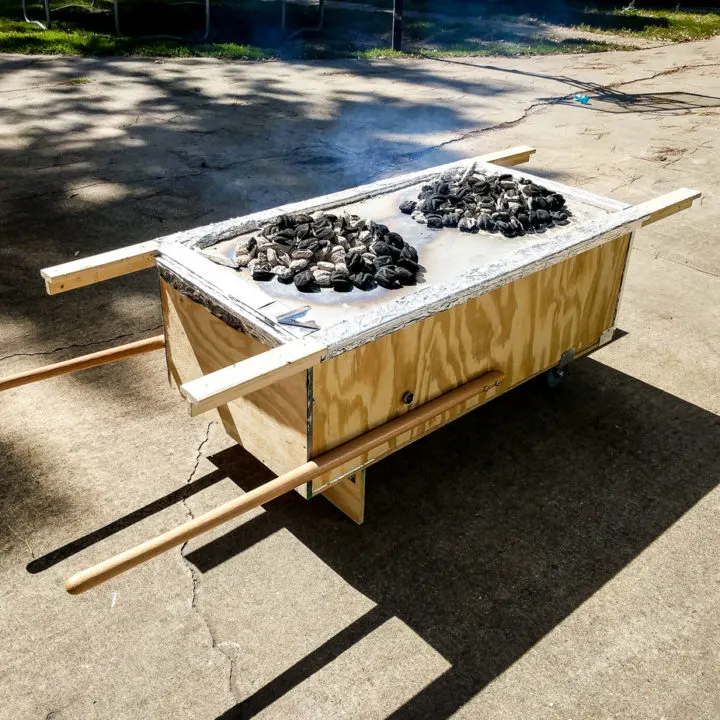
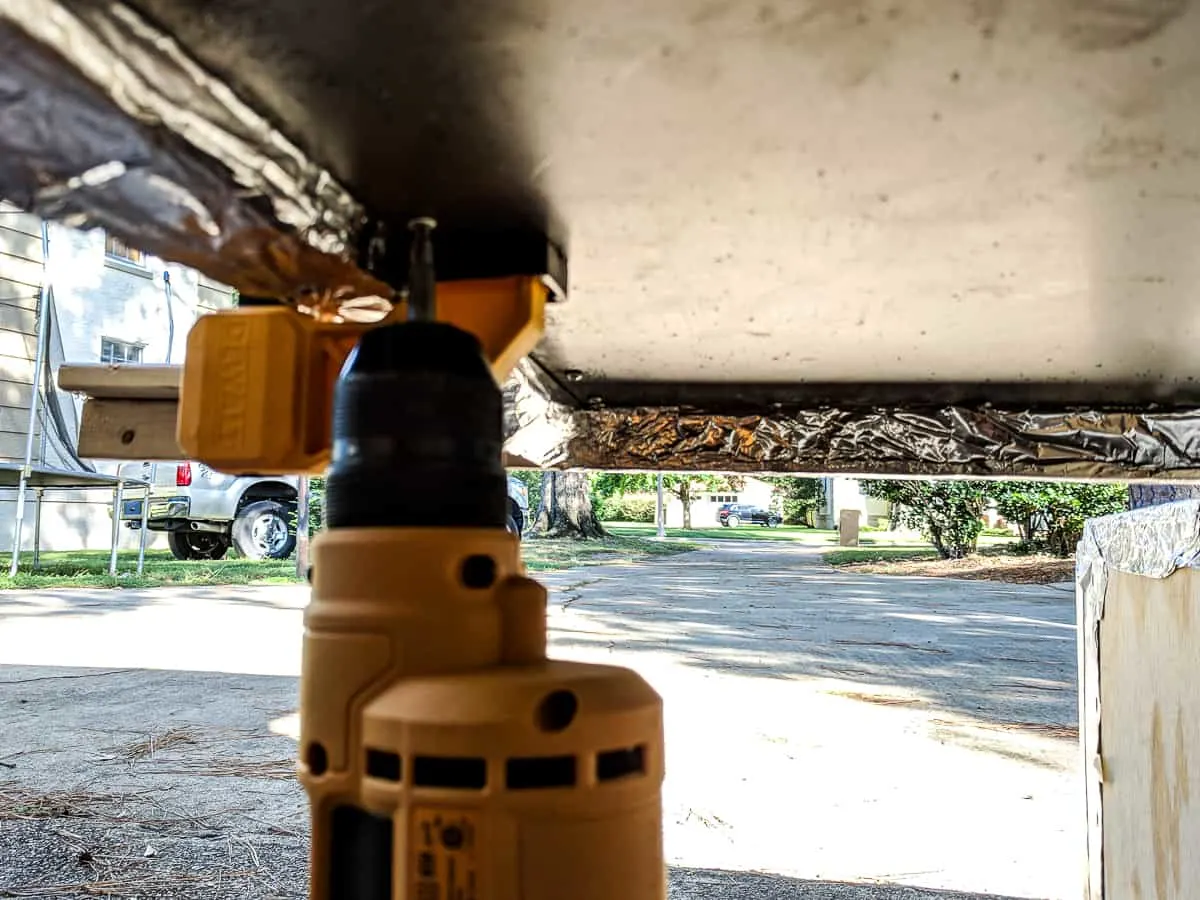
Not wanting to waste effort, I wanted to make sure I could use my own Caja China more than once, so it was going to have a rather robust design. I also wanted to make it useful for handling and transport, so I added wheels, a support leg, and handles from a wheelbarrow. Additionally, I found a roll of flash aluminum to cover the inside of the box to help radiate heat from the sheet to the pig. I still use aluminum foil, but the sheeting increases efficiency.
Gathering the building materials
Obtaining all of the materials needed to construct my own Caja China was a bit of a challenge. With the biggest problem being obtaining the sheet of steel for the top cover of the roaster.
Depending on where you live, you may experience a similar if not more difficult time finding the right sheet of steel. While the instructables.com design called for 20-gauge ungalvanized steel, the local steel supply store only had 16-gauge. A casual observer may look at this and say, “What’s the difference?” The difference is huge!
The thickness of 20-gauge steel is 3/80th of an inch, while 16-gauge is 1/16th of an inch thick. It does not seem like much, but calculating the conductive heat transfer of steel for that difference in thickness means adding approximately 100 minutes to the initial 4-hour roasting time.
Not taking this into consideration would have meant having a very undercooked pig with the 16-gauge ungalvanized steel.
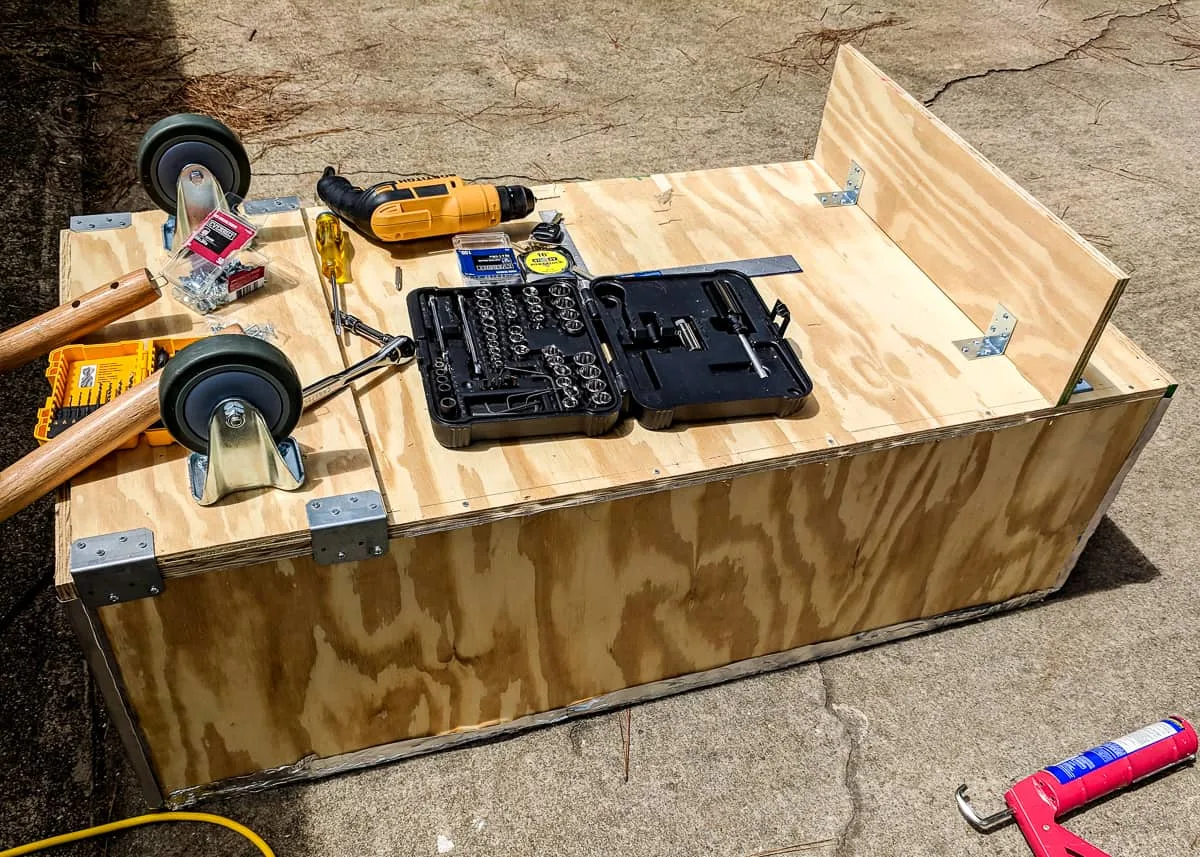
Additional Construction Notes
Overall, assembly of the customized Caja China took about 10 hours. I could not do it by myself as quickly as I did. I was fortunate having my dad with me to assemble the box, and then friends would come by to help cut metal, finish the top cover, and add the neat accouterments. Construction can be accomplished alone, but if you are looking to make this in a single weekend, having help speeds the process considerably.
Diagrams and instructions to build your own pig roaster:


How to Build La Caja China
How to Build a Caja China, aka, Pig Roasting Box. This tutorial will show you how to build your own pig roasting box to roast a whole pig without a pit. Part 1 of a 3 part series documenting how to build a pig roaster, source a whole pig, and roast a whole pig.
Materials
- 1 sheet of plywood, .75" thick
- 1 box of #8 1.5" wood screws
- 2 boxes of #8 0.5" stainless steel sheet metal screws (ungalvanized)
- 1 roll of 14" wide flash aluminum
- 1 roll of heavy-duty aluminum foil
- 2 eight-foot L-shaped aluminum rods, no thicker than 16-gauge
- 2 1x3 furring strips, 8 feet long
- 2 1x2 furring strips, 8 feet long
- 1 48"x24" sheet of ungalvanized steel, 16-gauge (20-gauge preferred)
- 2 casters, optional
- 2 wheelbarrow handles, optional
- 3-4 bricks
- 2 17"x25" oven or smoker racks
- 4 2.75" S-hooks
Tools
- Circular Saw
- Metal-cutting Circular Saw
- Philips head Screwdriver
- Power drill with wood-boring and metal-boring bits
- Staple gun
Instructions
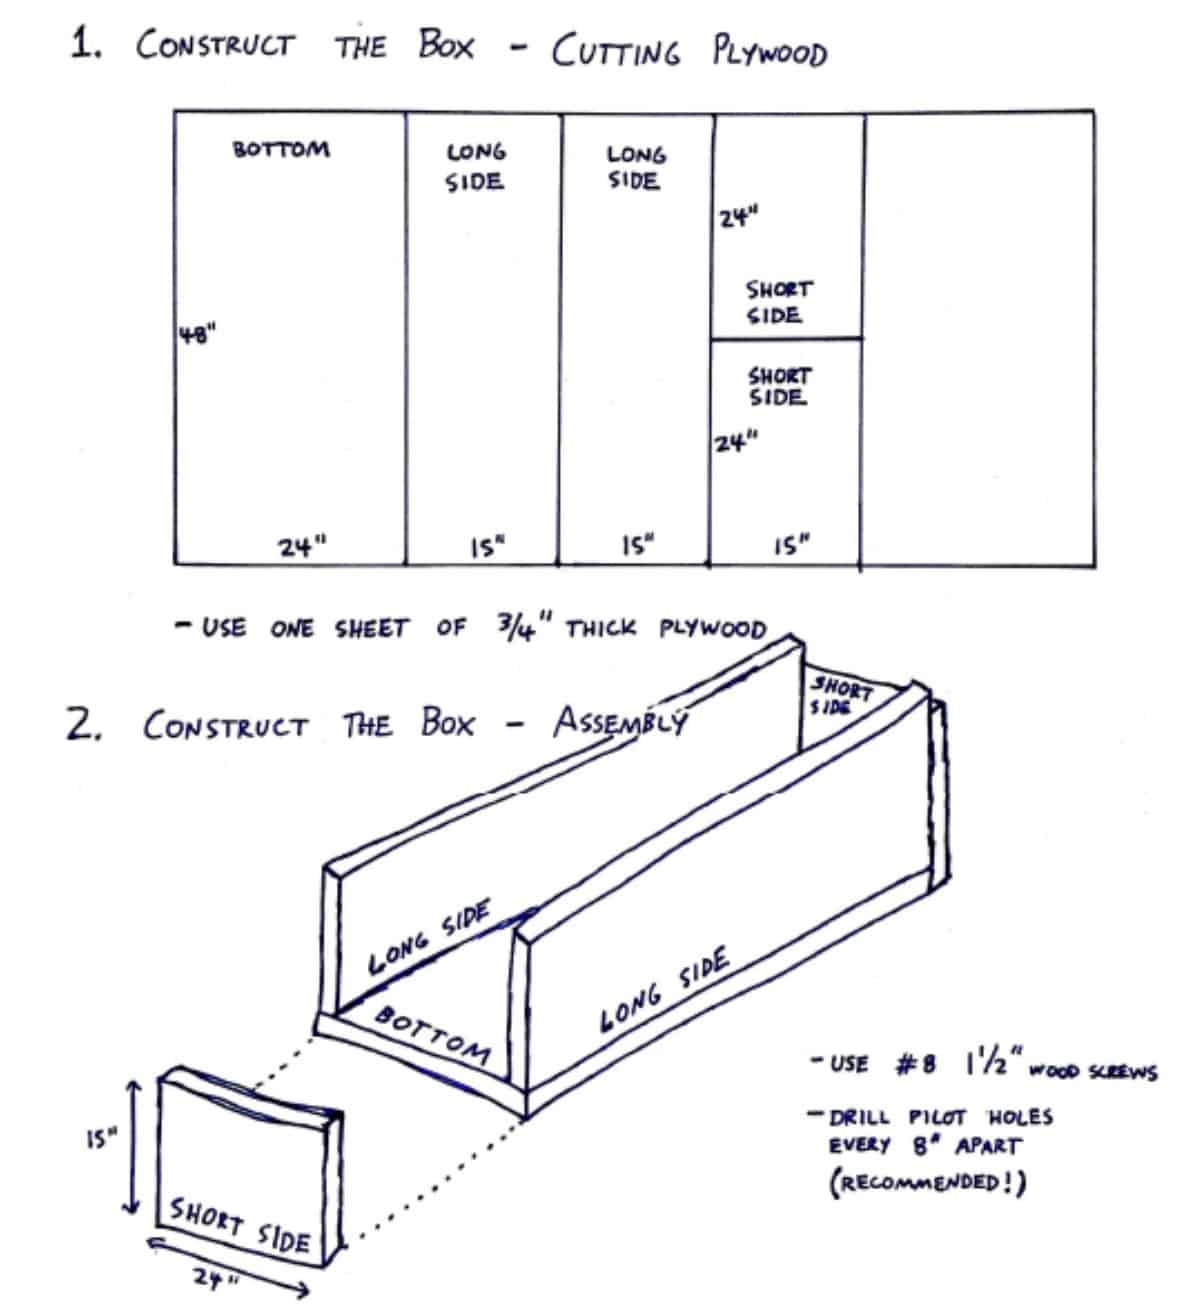
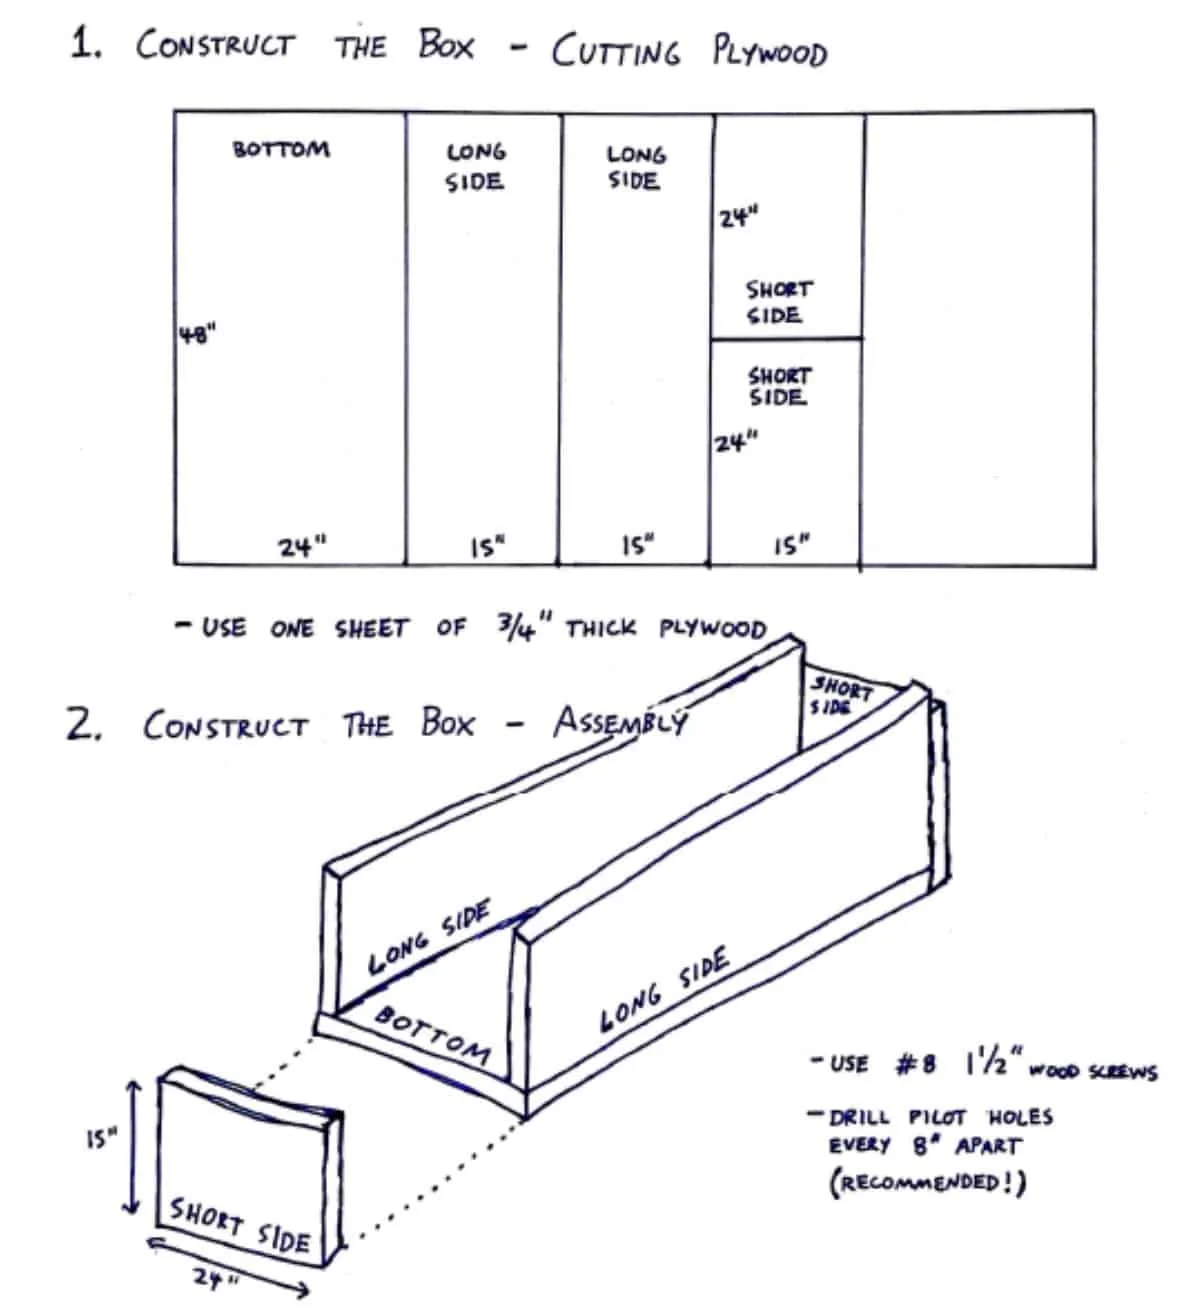
1.Pre-cut your plywood to obtain the following:
a.1 48”x24” sheet (the bottom side)
b.2 48”x15” sheets (the long sides)
c.2 24”x15” sheets (the short sides)
d.Keep the excess plywood to make legs and attach the wheels/casters if desired
2.Pre-cut both 1x3 and 1x2 furring strips to the following:
a.Two 6’ lengths and two 2’ lengths
3.Pre-cut the L-shaped aluminum rods to form the following brackets:
a.Two 46” lengths and two 12” lengths
b.Keep the excess L-shaped aluminum rods if desired
4.Construct the wooden box in such a way that the long sides rest on top of the bottom side, not beside it. The bottom of the short sides should be flush with the bottom side. To fasten, drill pilot holes every eight inches and use the #8 1.5” wood screws. The box should look like the long sides sitting higher than the short sides.
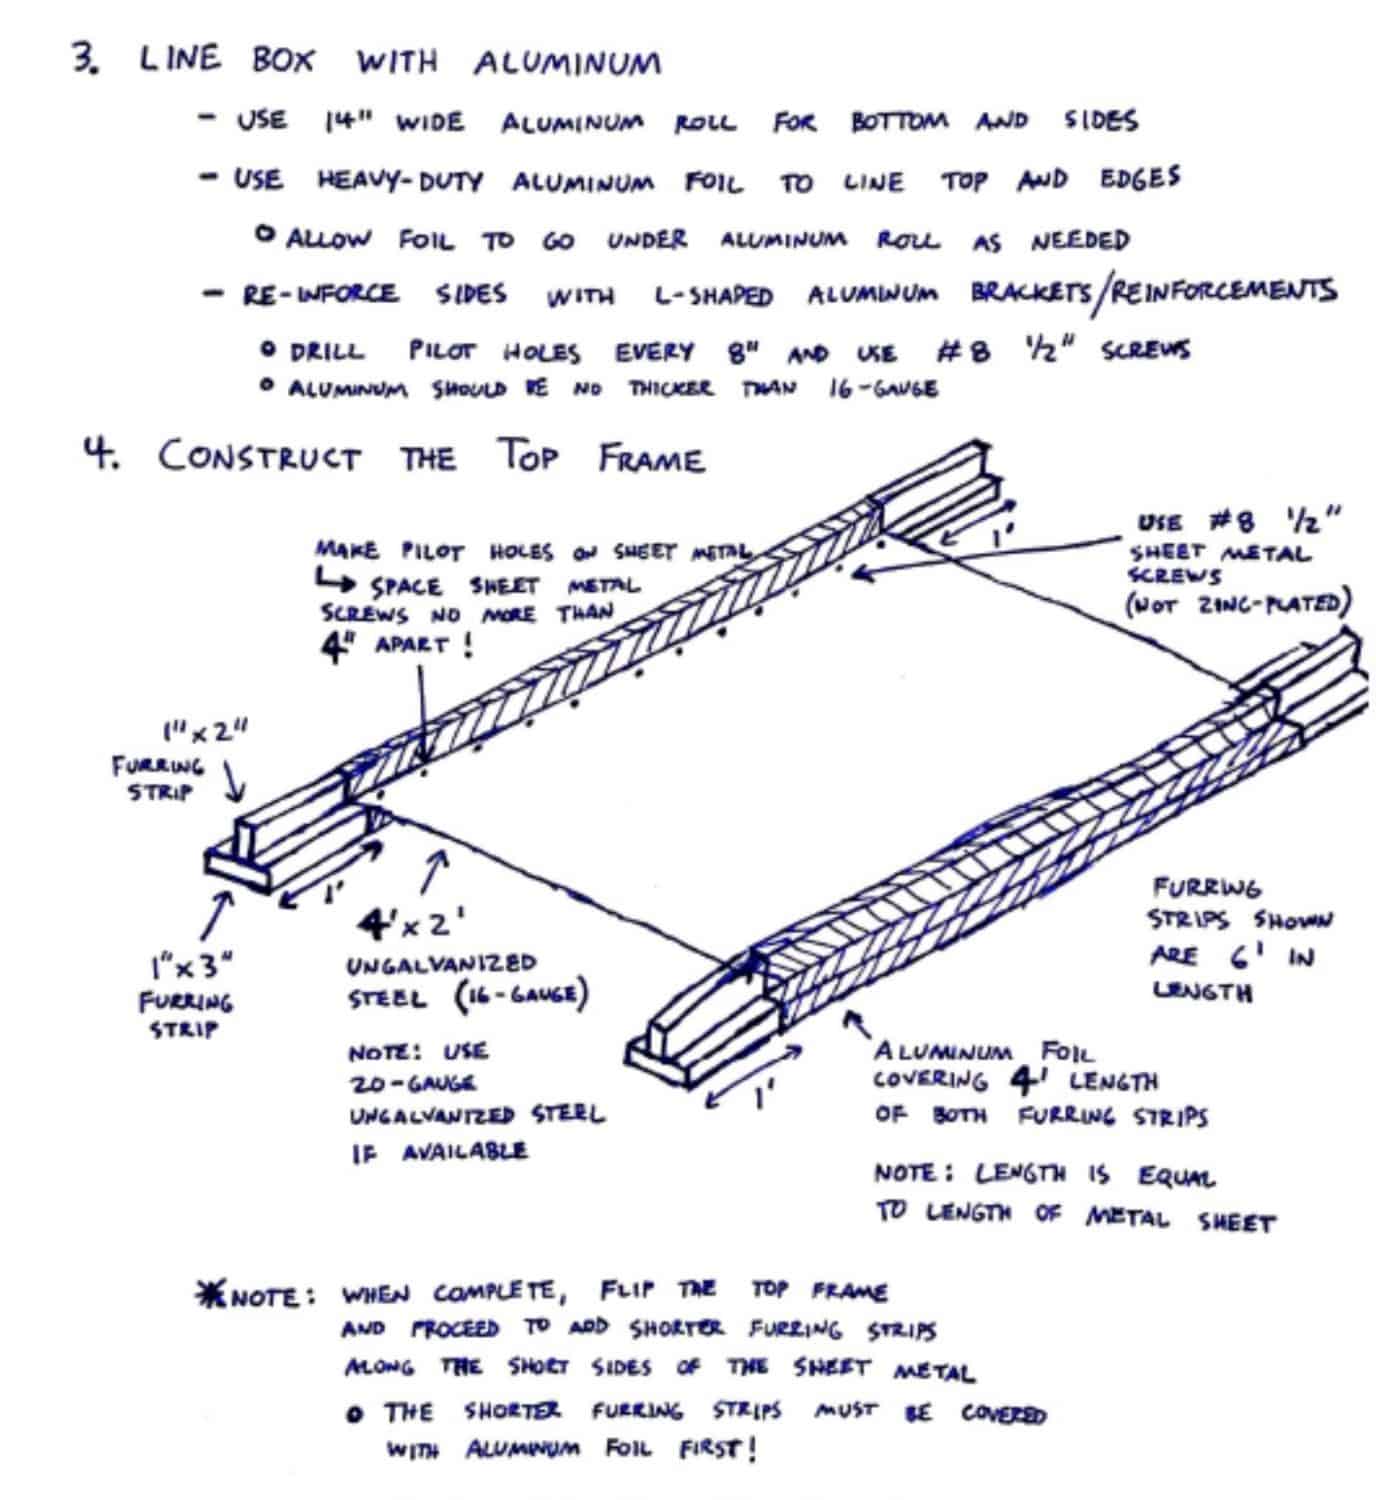
5.Use the 14” wide roll of flash aluminum to line the inside the box from the bottom. Use the heavy-duty aluminum foil to cover the top edges of the box. Allow the foil to go between the flash aluminum and the interior plywood surface. You now have completed most of the box.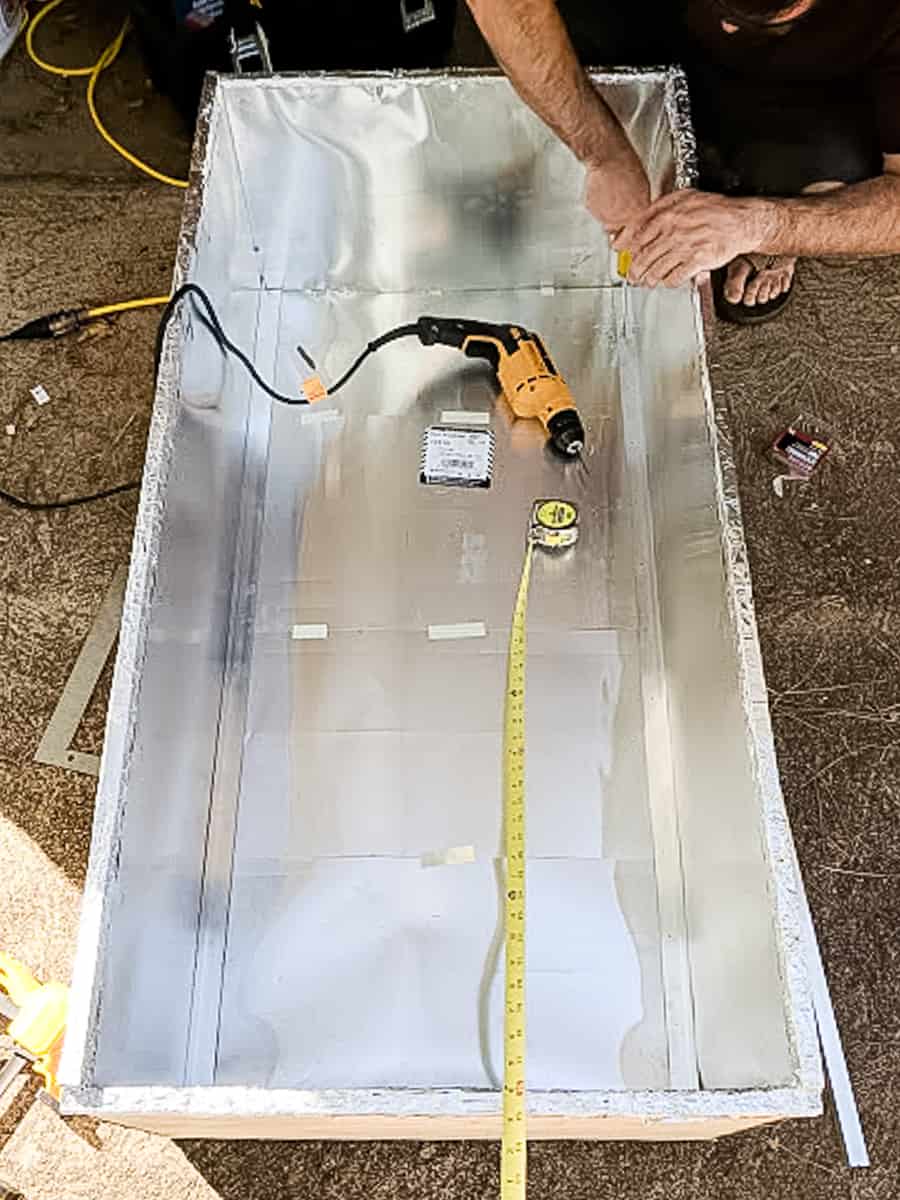
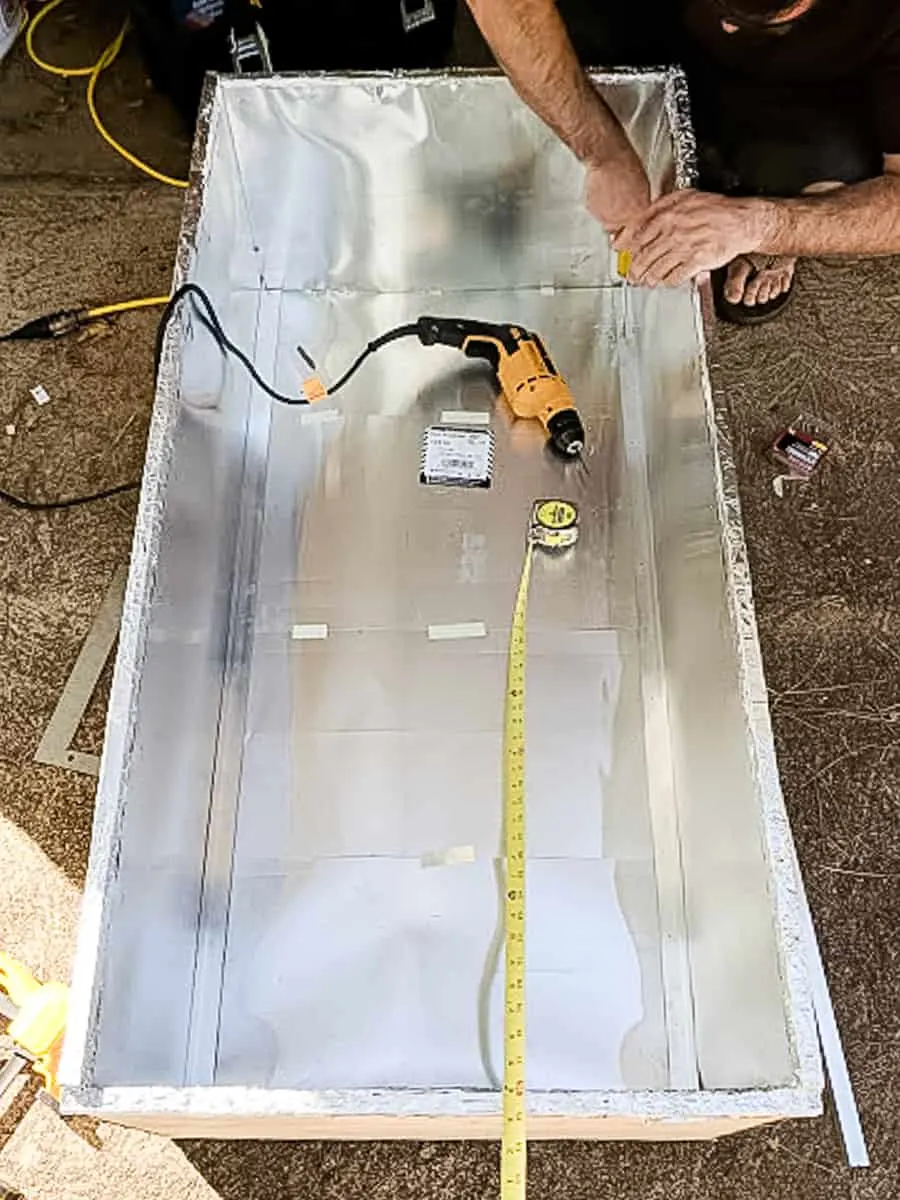
6.Reinforce the sides of the box with the L-shaped aluminum brackets, with the longer brackets along the longer sides of the box and the shorter brackets for the shorter sides. Drill pilot holes every eight inches along both of the L-shaped sides of the brackets, and fasten the brackets to the flash aluminum and plywood using the #8 0.5” sheet metal screws.
7.Wrap the middle four feet of all 6’ length furring strips (both 1x3 and 1x2) with heavy-duty aluminum foil. Use a staple gun to staple the foil to the furring strips as necessary.
8.Fasten the middle of the wider side of the 1x3 furring strips to the narrower 1x2 side of the furring strips, thus resembling an extruded “T.” Lay down the furring strips such that they are resting on the three-inch wide side.
9.Line your sheet of ungalvanized steel so that each of the longer sides rest on the corner of the Ts. The steel sheet should be lined up with the foil-wrapped surfaces of the furring strips. Drill pilot holes along the longer sides of the steel sheet no more than four inches apart. If you are using a 20-gauge ungalvanized steel sheet, the pilot holes can be up to six inches apart. Use the #8 0.5” sheet metal screws to fasten the steel sheet to the T-corner of the furring strips. You now have part of the top frame completed.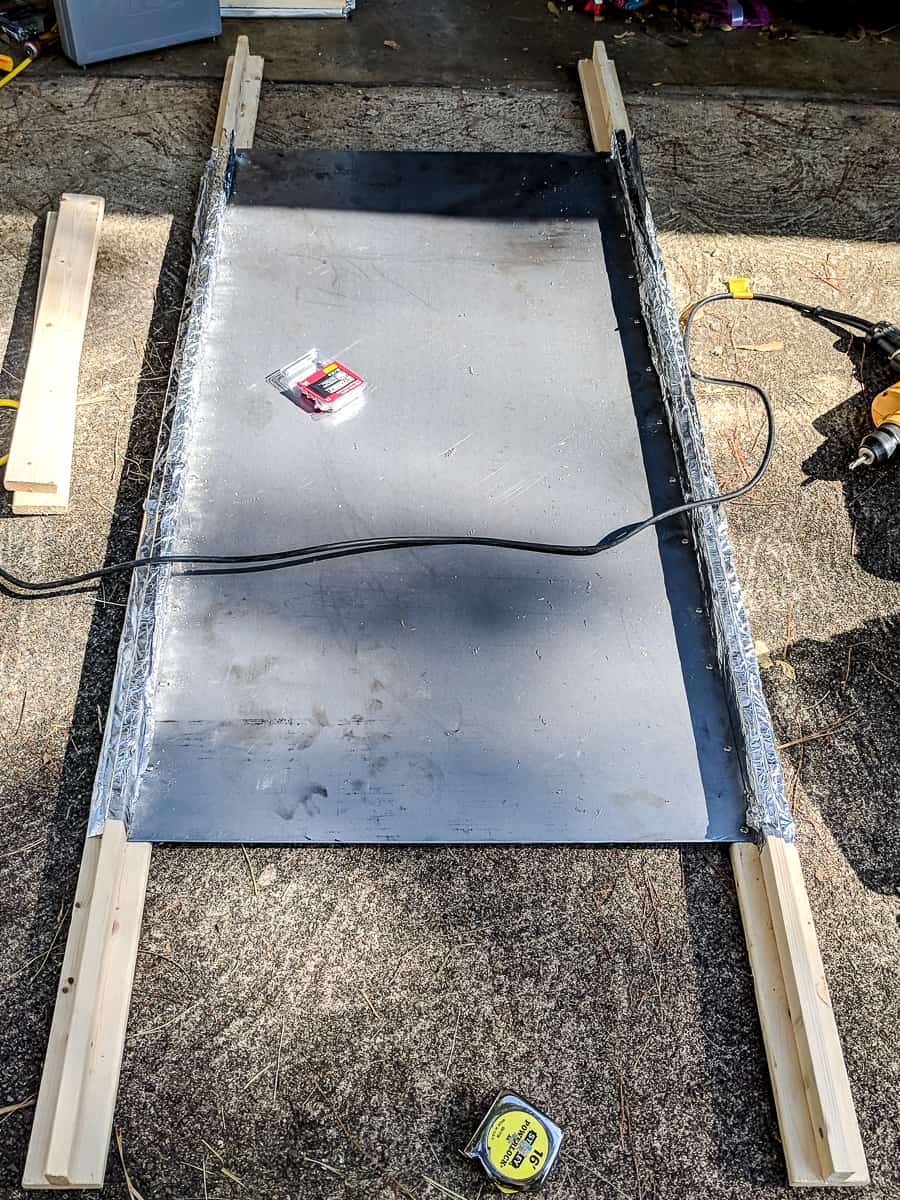

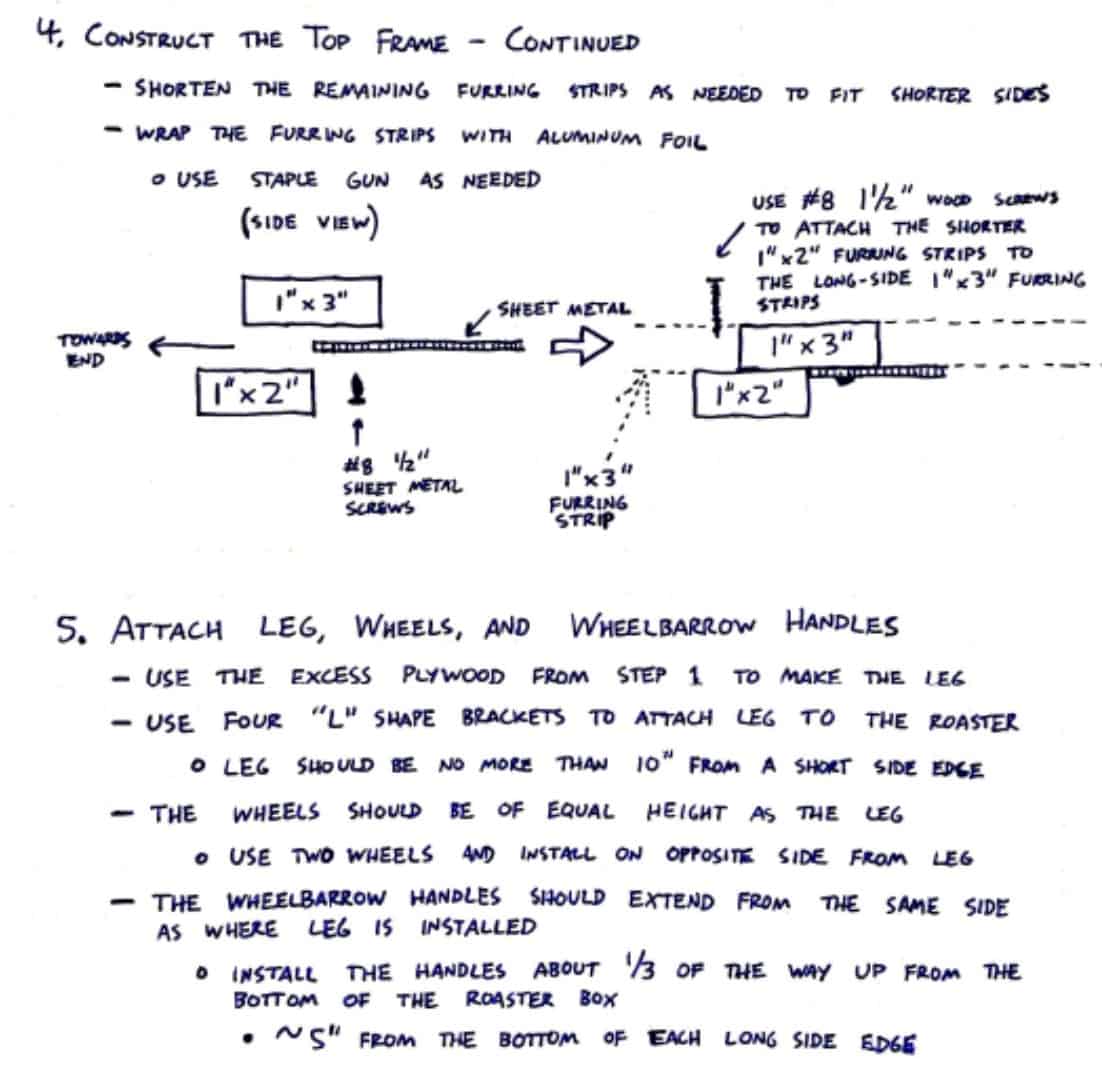
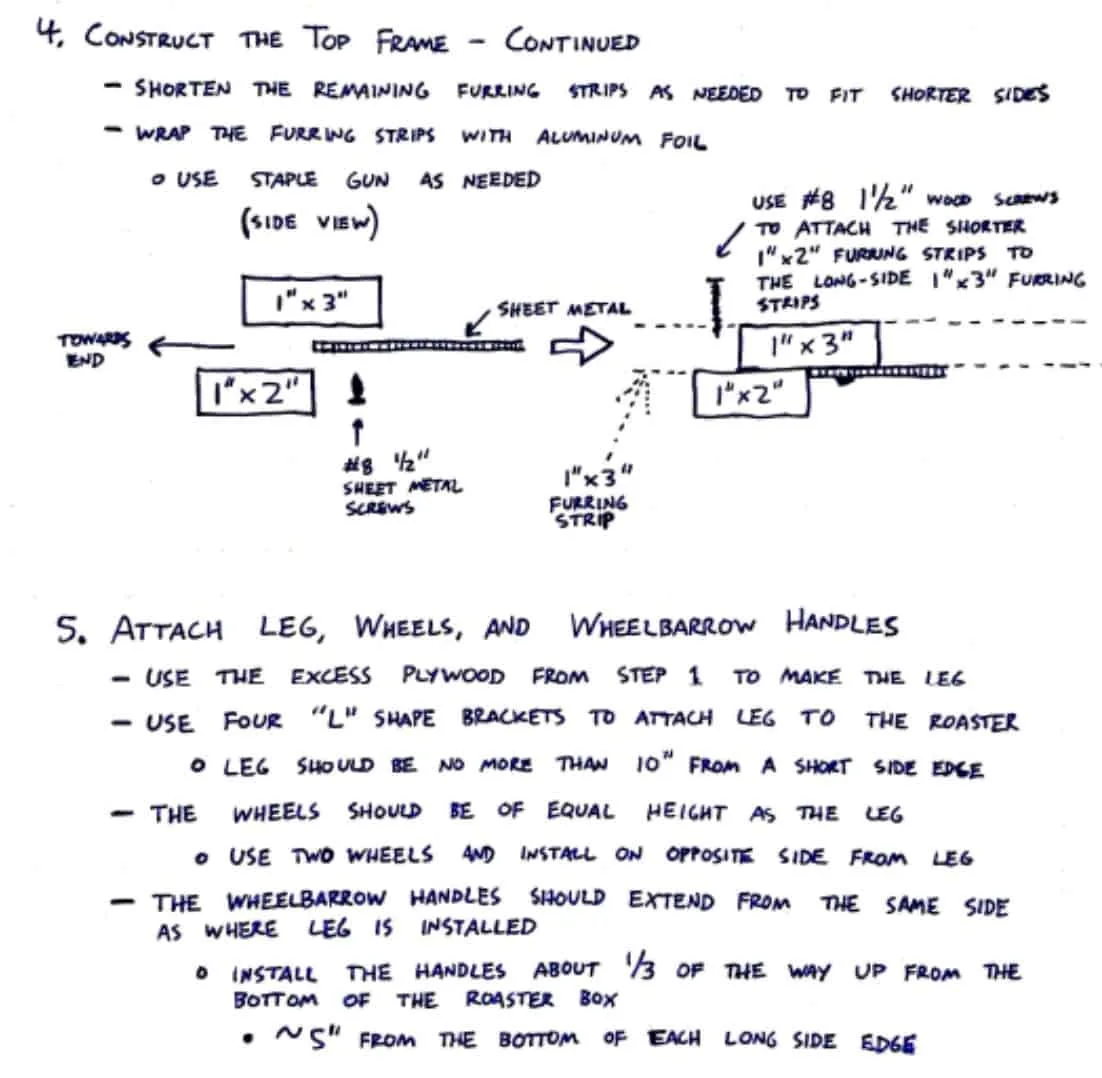
10.Wrap all of the 2’ length furring strips (both 1x3 and 1x2) with heavy-duty aluminum foil. Use a staple gun to staple the foil to the furring strips as necessary.
11.Align the 1x3 furring strips to under the short sides of the steel sheet, with half of the three-inch wide surface exposed. Shorten the 1x3 furring strips if necessary so the ends of the furring strips snugly fit between the two-inch sides of 1x2 furring strips of the partially-completed top frame. Drill pilot holes along the short side of the steel sheet similar to the previous step. Use the #8 0.5” sheet metal screws to fasten the steel sheet to the plywood.
12.Flip the top frame over. Align the 2’ length 1x2 furring strips along the shorter side of the top frame but on top of the exposed half of the 1x3 furring strips that were just fastened. Shorten the 1x2 furring strips if necessary so the ends of the 1x2 furring strips snugly fit between the one-inch sides of the 1x3 furring strips of the partially-completed top frame. At the ends of 1x2 furring strips use #8 1.5” wood screws to attach the 1x2 furring strips to the 1x3 furring strips of the longer sides of the top frame. Your newly completed top frame should now snugly cover the box.
13.OPTIONAL: Use the excess plywood to construct legs for your Caja China. Use the excess L-shape aluminum rods as brackets to hold fasten the leg(s) to the box. The leg(s) should provide no more than 10 inches of height. You can use wheels or casters to support the Caja China, but ensure that the Caja China remains level (no tilt or incline) after installing. Attach wheelbarrow handles to each of the long sides, with the handles extending from the same side where the leg(s) is (are) installed (not on the same side as the wheels or casters). Install the wheelbarrow handles no more than one third of the way up from the bottom of the Caja China, which approximately five inches from the bottom edge of each long side.