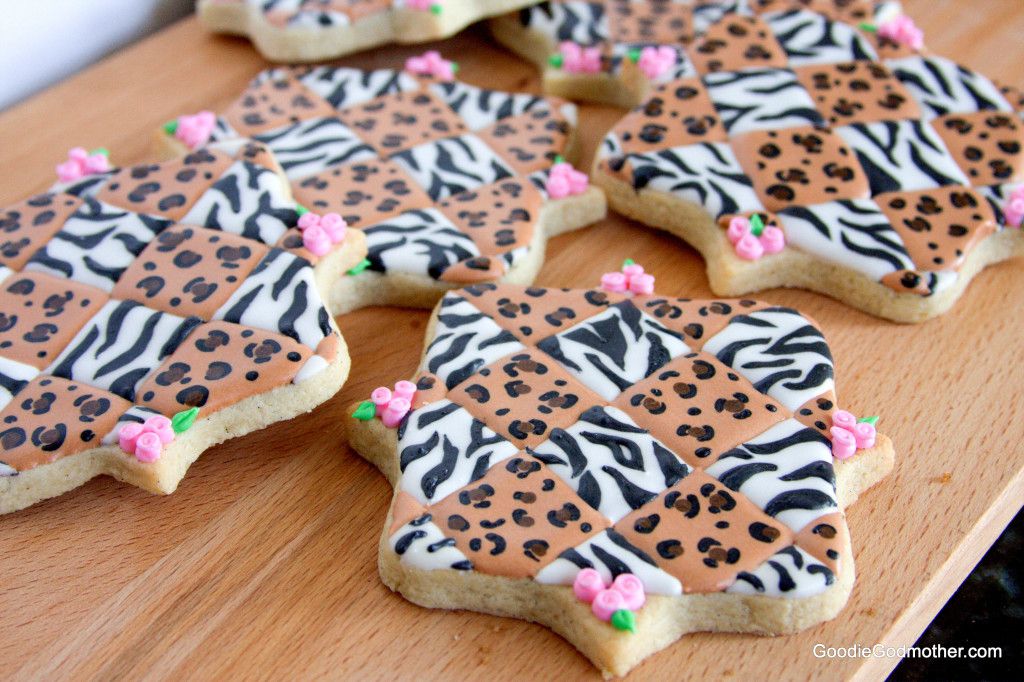
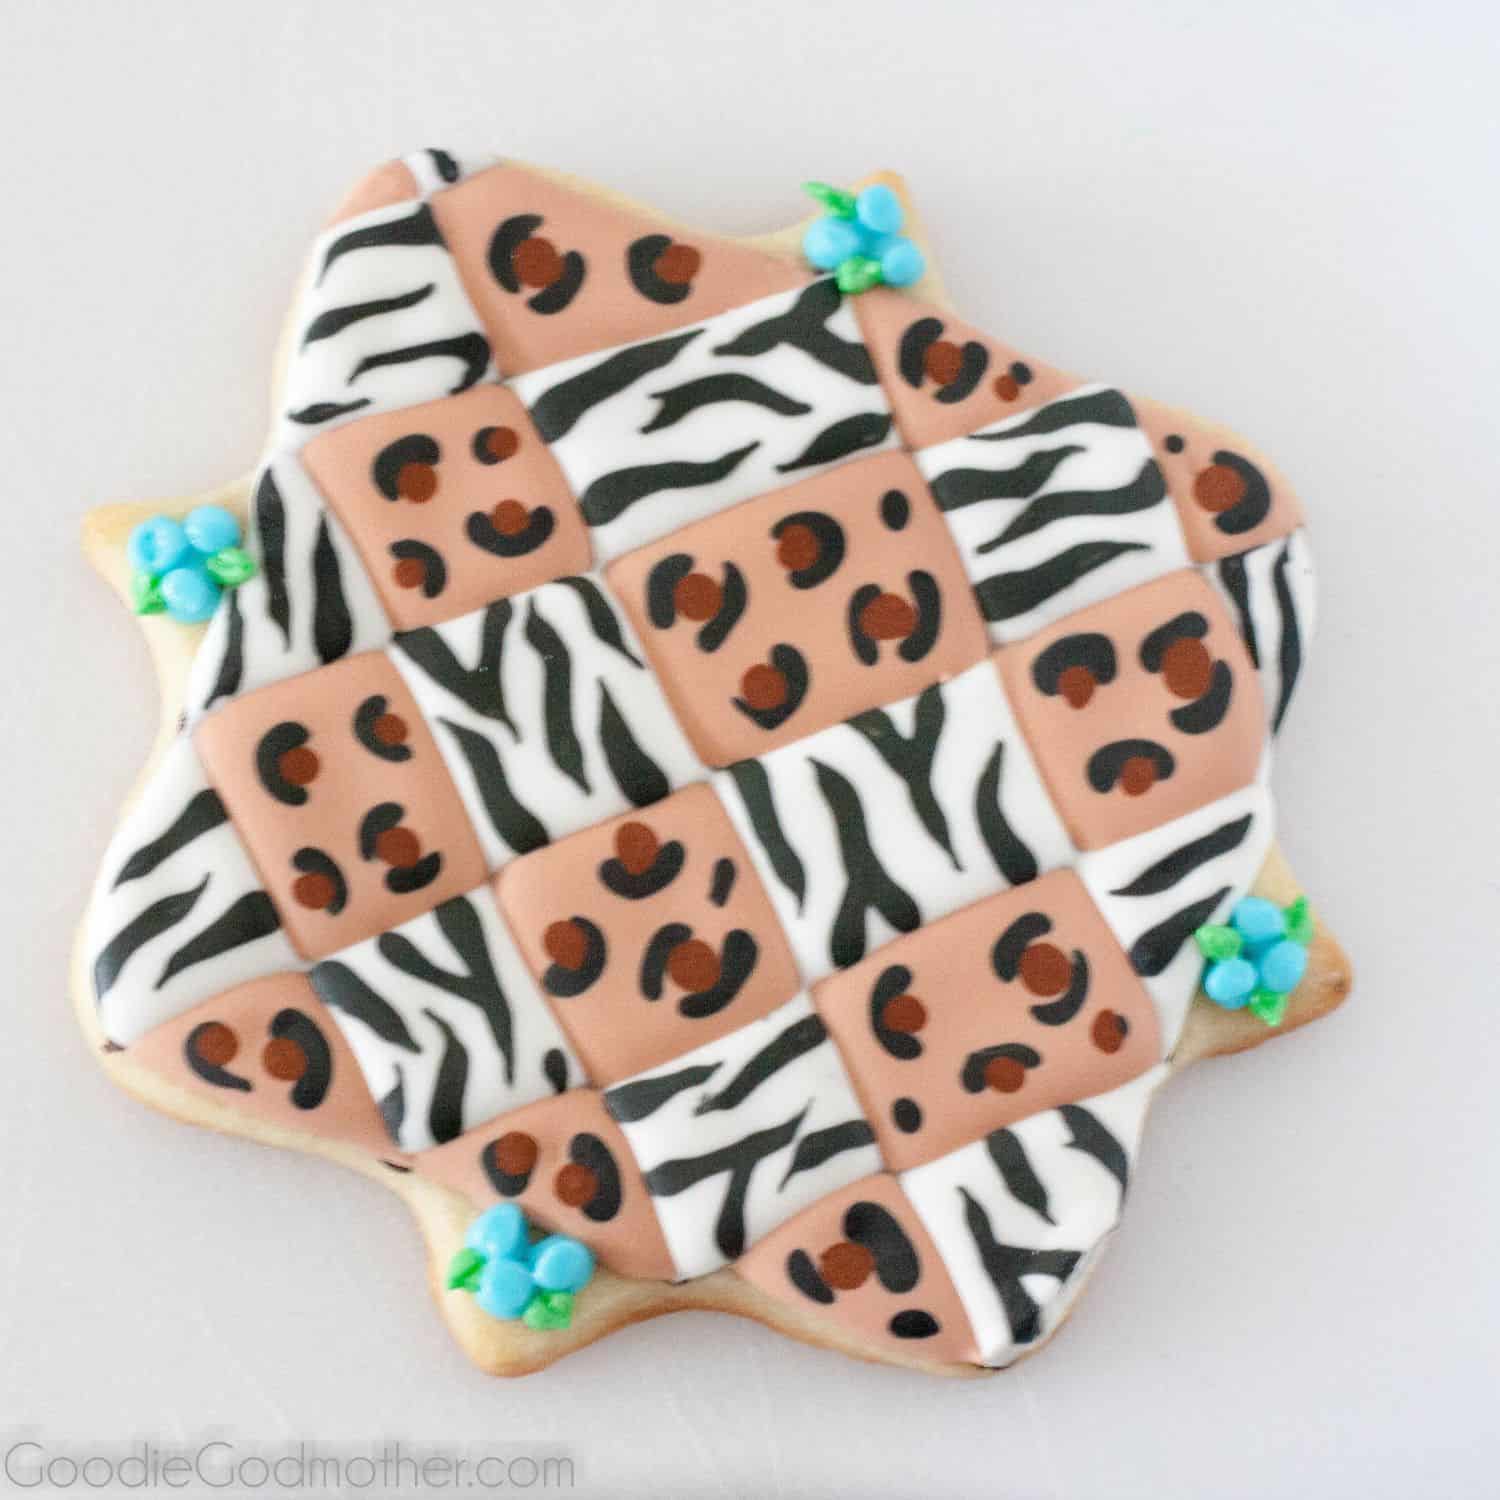
Let me start off by saying that I think animal print is a neutral and these are, therefore, very subtle cookies. 😉

When we moved out to Virginia, I searched everywhere for cake decorating classes that would fit with my schedule so I could become a better sugar artist. Unfortunately, I didn’t find quite as much as I was hoping, but not one to focus on the negative, I searched for an alternative. Lo and behold, I find Craftsy (aff). I check out a few of their free classes, like the format and flexibility, and decide to sign up for Sweet Elegance: 16 Cookie-Decorating Techniques (w/Amber Spiegel) since I’ve followed her blog for a while and I love her delicate lacy vintage style. I’ve learned a lot that has helped me start to refine my technique, so it was definitely a worthwhile investment, and it’s the reason these cookies exist.
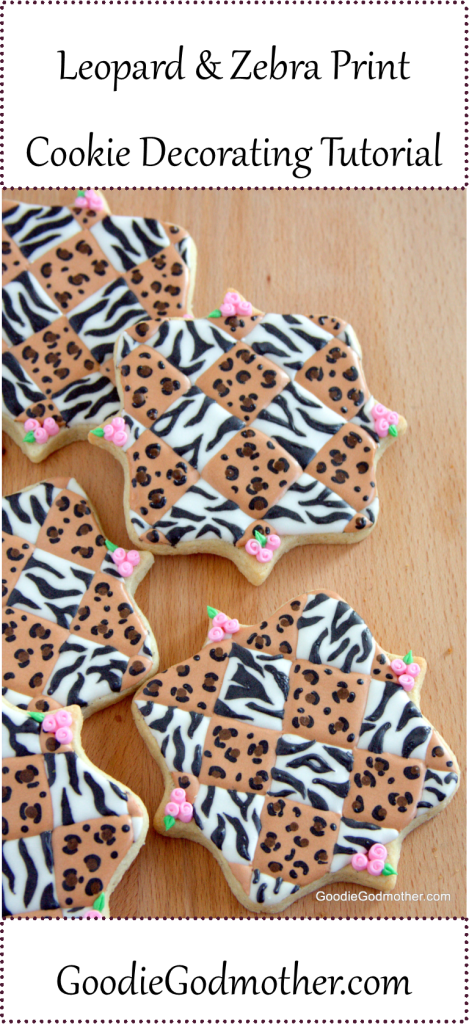
You see, I watched the quilting technique lesson one Saturday morning and then later that afternoon, while we were folding laundry, I happened to fold one of my daughter’s leopard print onesies and one of my daughter’s zebra print onesies and stack them together in her hamper. The contrast caught my attention and I first thought, “I’m going to make this into a cake! A fabulous multi-tier cake with diamonds of leopard and zebra print, and DIAMONDS!” I was channeling a very Bob Mackie vibe in my mind and it was GLORIOUS! For some reason, the Godfather didn’t think I needed to bake a cake with 75+ servings on a whim just to bring this pattern combination to life. Party pooper! Again though, we move on, and I may have snipped “Well fine then, I’ll make it into a cookie. A FAAAAAABULOUS cookie!” And I did.

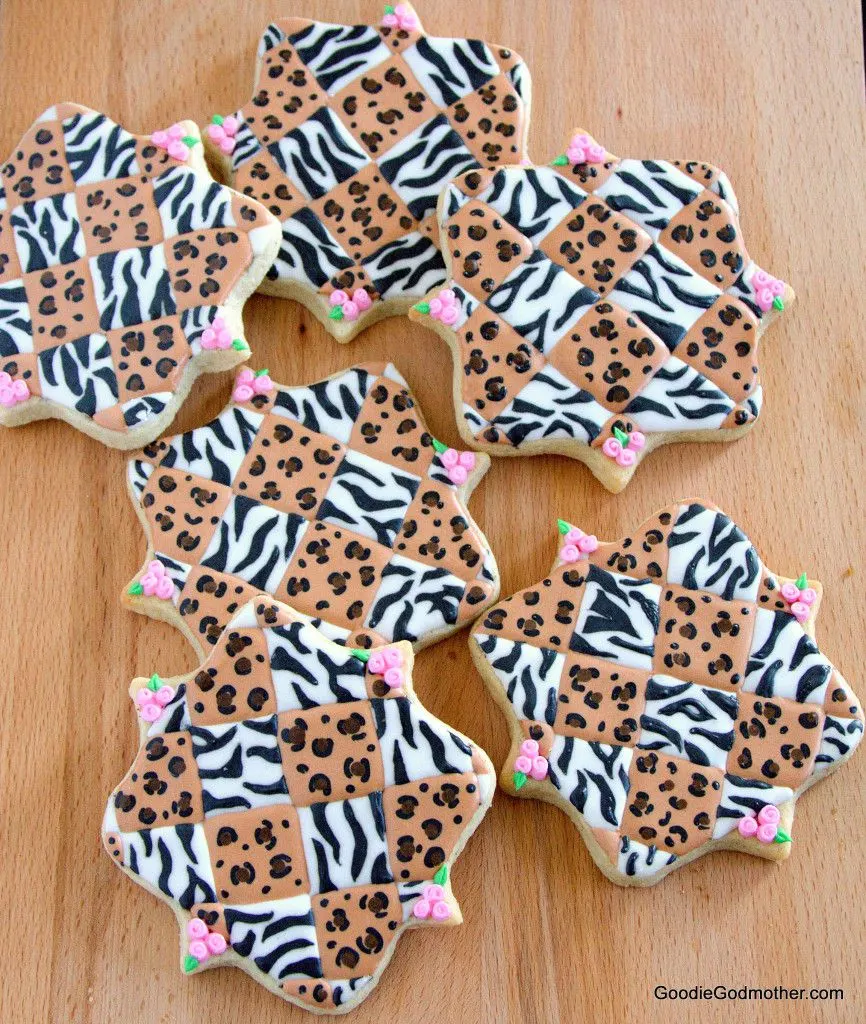
In fact, as far as I know, the leopard zebra quilted cookie is a Godmother original, so hooray! I made the cookie quilting following the technique I learned in my Craftsy class, which was much simpler than how I would try to quilt before, and even the Godfather, who isn’t a fan of animal print in general, expressed his admiration of the finished product. I took some to lunch with some girlfriends to share, posted a quick pic on the Craftsy class page, planned to put it up on my social media later, and didn’t think about it. But then the instructor commented on my photo in the class and said she thought they were really creative AND shared them on her Facebook page! I was really excited! When I shared my work on a group I’m in, I had a few people ask me how I made them, and so I decided to go ahead and put together this tutorial for you. 🙂
While I’m 97.8% sure this design is a Goodie Godmother original (I searched), the techniques used are most definitely not. I previously learned how to create the zebra print using the wet-on-wet zebra print decorating tutorial from SweetAmbs, and leopard print spots via Sweet Sugar Belle. Use your favorite cutout sugar cookie recipe, or try a fun flavor with my pumpkin sugar cookie dough or eggnog sugar cookie recipe. I like to use Sweetopia’s royal icing recipe for piping.
Materials List:
- 6 Disposable piping bags (find at a craft store or via the Amazon aff link)
- 6 couplers (find at a craft store or via the Amazon aff link)
- 4 #2 frosting tips, 2 #1 frosting tips, 1 #5 frosting tip (you can find all at a local craft store)
- 1 batch of your favorite royal icing recipe
- Gel coloring – This set of 12 Americolor gels is what I use (aff). You’ll need black, brown (to make tan and a dark brown), green, and your preferred rose color
- A scribe tool (aff) or toothpicks
- A square tipped paintbrush (head to the craft store for this one)
- A ruler
- edible ink marker (aff)
How to Make The Leopard and Zebra Print Quilted Cookies:
Quick note: I’m going to go kind of quickly over the quilting part and assume a basic knowledge of cookie decorating and royal icing consistencies. If I went into detail this post would be way too long!
- Fill 6 piping bags as follows:
- 1 white flood consistency piping bag, #2 tip
- 1 black flood consistency piping bag, #2 tip
- 1 tan flood consistency piping bag, #2 tip
- 1 flood consistency dark brown piping bag, #2 tip
- 1 medium consistency blue or pink (whatever your flower color) piping bag, #2 tip, set aside a #1 tip for later
- 1 medium firm consistency green piping bag, #5 tip
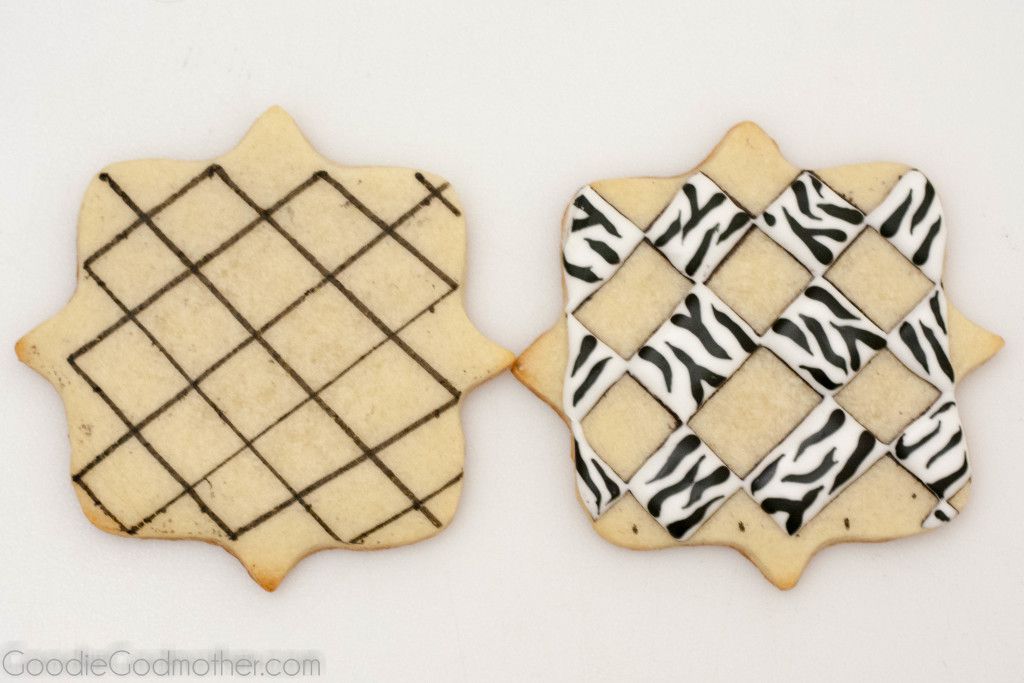
- Take your cooled cookie, your ruler, and edible ink marker, and draw your pattern grid directly on the cookie. Working one square at a time and filling in only alternating squares, pipe your white base and then your black zebra lines. Use the scribe tool or toothpick to pull the tips of the zebra lines a bit for a natural look. If your square isn’t perfect, use the square tipped paintbrush to gently scoot the edge of your zebra square to match your drawn grid. Once you’ve finished all the zebra print squares on the cookie, set it aside to dry completely (at least 4 hours).

- When the zebra print squares have dried completely, go back and fill in the remaining squares with a base layer of tan/gold and leopard spots made with the black and dark brown. Work one square at a time and use the scribe tool to ensure you get the base icing into the little corners. If your shape has extra little edges where you’d like to add flowers and you won’t disturb the rest of the design, move on to the next step and add your flowers now. If you plan to add flowers on top of the design, wait another 4 hours for the leopard squares to dry. If you don’t plan to add flowers at all, you’re done (but let the cookies completely dry of course!).
- To make flowers as I did on these cookies, Pipe 2-3 beads using your medium consistency frosting in your color of choice. Set these aside to dry an hour or so. Then change the #2 tip on your flower color frosting to a #1 tip and draw a small swirl on the top of each flower base “bead”. Make the leaf by creating a green bead and pulling away to form a small “tail”. Let that sit for about 3-4 minutes and then use your scribe tool to gently press a seam down the middle of the leaf.
- Allow the cookies to dry completely before packaging or stacking.

Thanks for joining me and I hope you enjoyed my little tutorial! To learn more about cookie decorating, I recommend any of the other blogs I linked to above as excellent resources, and I invite you to check out Craftsy. The classes are wonderful, you can work at your own pace, and you have access to the videos forever so you can always go back and review concepts, ask questions to the instructor, all sorts of useful goodness. Enjoy!

This post contains affiliate links, typically denoted by (aff). Goodie Godmother receives a small commission at no cost to you should you click and make a purchase through the above links. Thank you for supporting this blog so I can continue to bring you pixie-dusted recipes and tutorials! All opinions and recommendations though, are 100% my own.

Meaghan | Cook. Craft. Love.
Sunday 19th of July 2015
I'm so impressed by you it's ridiculous. I'm pretty much way too lazy to do this on the regular but I love to watch these videos!
TheGodmother
Friday 24th of July 2015
Ha, one day! Thanks :)