

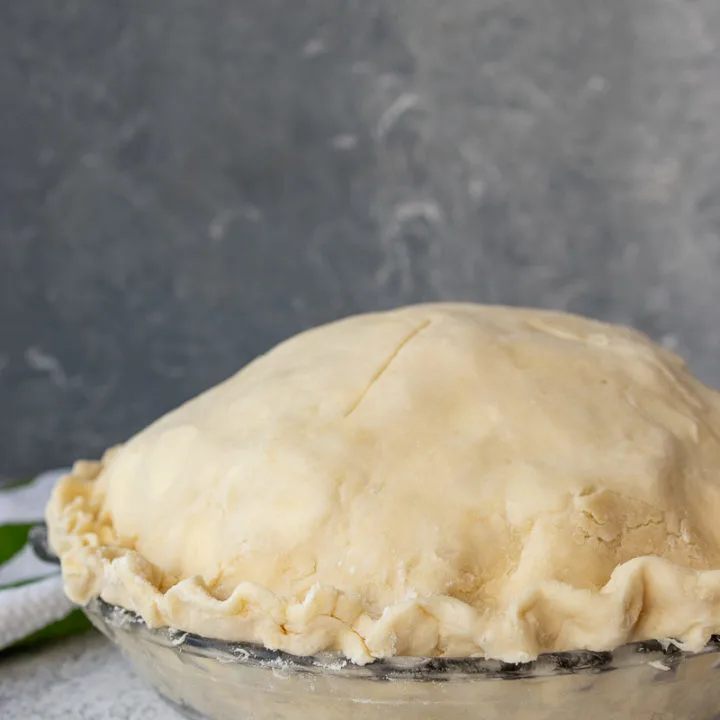
Homemade pie crust with just a few ingredients you probably have on hand! This technique makes a flaky all butter pie crust that is tender and works for sweet or savory pies!

I have spent years in the quest of the perfect all butter pie crust. There are a couple variations on this site, all attached to various pies. I even have a chocolate version on my chocolate bourbon pecan slab pie! But this season I think I’m finally closing in on my favorite. Scratch that. This all butter pie crust IS my current favorite.
My only issue is that it works best with my 9 inch pie dish and I don’t have a lot of extra when I use my 9.5 inch pie dish. This seems minor until you want to make some elaborate design on top of the pie that requires scraps. Maybe this is the universe signaling that simple is best? Or maybe just that I need to pull out my rolling pin spacers to roll the crust thin enough consistently?
Anyway… with a slew of pies about to be baked (and a couple recipes in the blog queue), let’s talk about making your best all butter pie crust yet.
Can an all butter pie crust be both tender and flaky?
Yes! So usually you have to choose a bit. Pie crusts are a very debated issue among home cooks. Some are team shortening (or lard), others are team butter, and some are camp “why choose?” and mix both. All have valid arguments.
Pie crusts made with shortening or lard are very flaky. The lower water content in the fat allows for great layering in the crust. Except the flavors aren’t as good as butter. Even butter flavored shortening isn’t the same. And if you are using lard, you’ll need to source a rather unflavored lard. Leaf lard is best for baking. I’ve bought it from my local farmers to use mostly in other dishes.
I’m team all butter crust. The decision was based purely on flavor. I like the flavor of butter, and I think it’s the best compliment to the pies I make. And now that I’ve discovered the technique secret to getting an all butter crust that’s both tender AND flaky. I win. So you win. We win! Sorry… little excited about this. Just wait until I get around to adding a video to this post…
And the final option, which is very popular and for good reason, is the blended shortening and butter pie crust. A little of both makes for a solid combination of good texture and some butter flavor. This actually works really well following traditional pie crust making methods, but you still get that “shortening” aftertaste. My family notices this, I don’t think it’s common. But if you notice it too, you know what I’m talking about.
DIY Pie Crust Techniques
Let’s talk about breaking rules. The recipe card will have a summary of the technique, but we break a few rules along the way, so I’m going to expand a little here. Pay attention class, let’s bake…
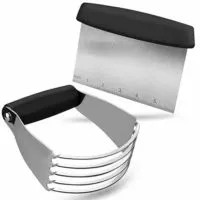
First of all, make this by hand. You could use a food processor, but it’s harder to control the size of your butter chunks. You’ll also be unable to properly complete the first step which is paramount to getting the best results. Use a big mixing bowl.
Second, don’t skip the 2 part process to adding your butter. You need both steps to get the best result, trust me. It doesn’t really add extra time. And if you have older small humans, you may be able to outsource. If you don’t like getting your hands dirty (or don’t have very short nails), please use some food safe gloves.
Tires screech and some of you are giving me the “I’m sorry, repeat that please?” look.
Yes, you will use your hands! It’s fine. Your dough will still be cold enough. There’s a technique to this that comes from French cooking called fraisage. In fraisage, you smear the flour and butter with the heel of your hand to make almost a paste. You can see a video example about halfway down this page on Online Pastry Training School. That’s not what we are doing here, exactly.
You won’t need to use the heel of your hand to press anything, but we will be using our fingertips to create little “mini smears” in the dough. Check out the steps below with pictures. For pie crust, I think pictures help so you understand what you’re looking for at each step.
How to make the best flaky all butter pie crust:
Start by combining the flour, salt, and baking powder in a large bowl. The baking powder also helps add a little lift to the crust. If you haven’t already, cut your butter into 1/2 inch cubes. Sprinkle half of them over your dry ingredients, and place the other half in the freezer.
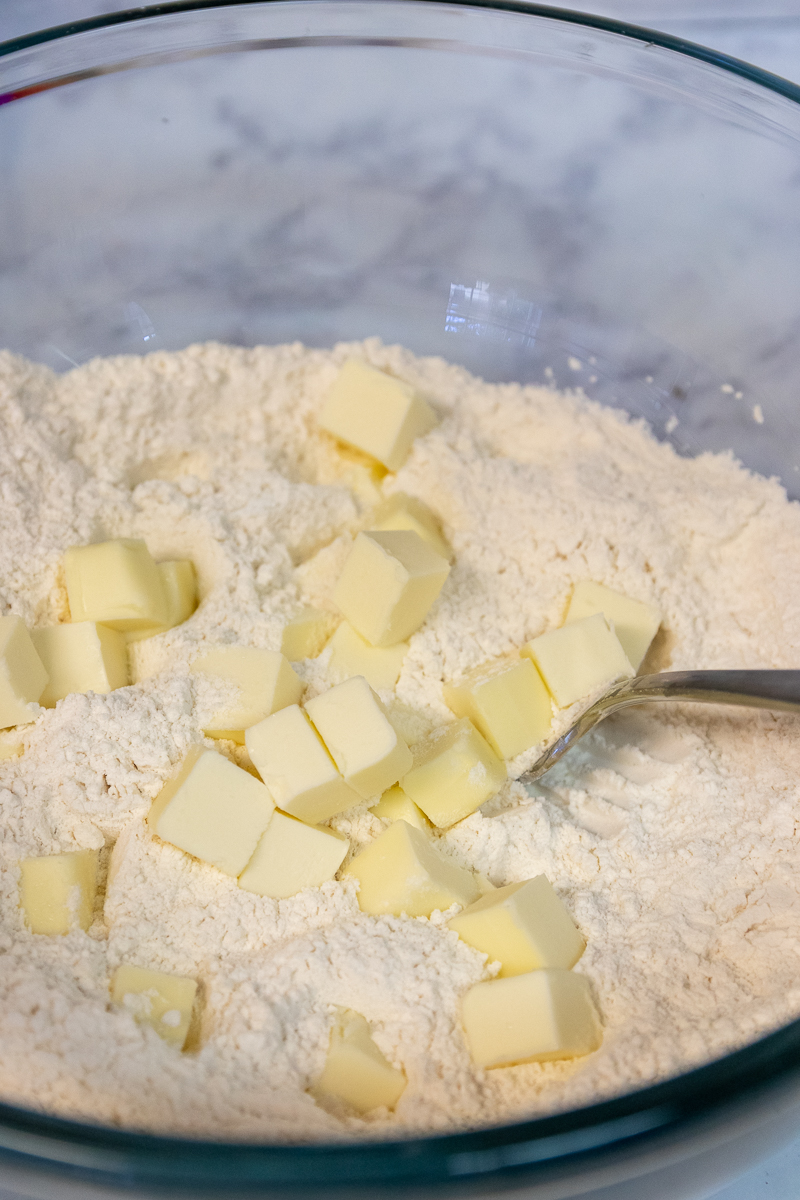
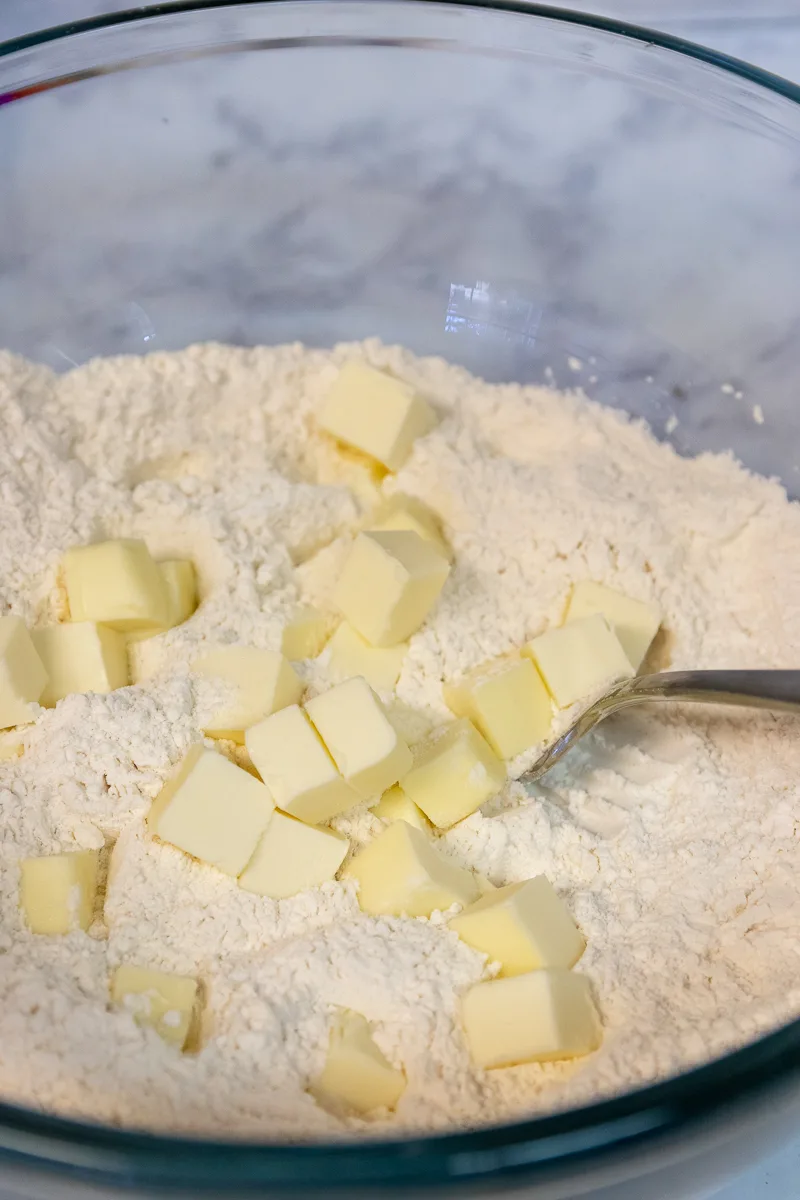
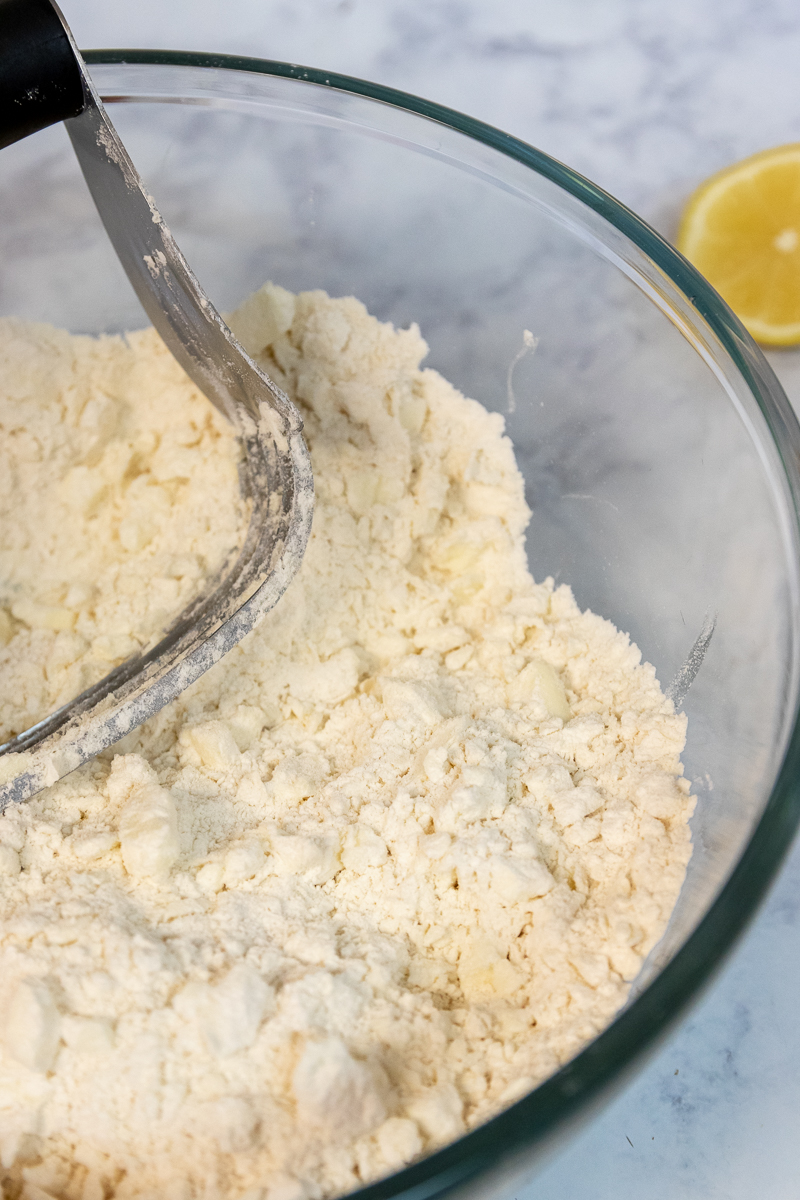
Use the pastry cutter 3-4 times just to get the butter coated in flour. Then, take just your fingertips and smash the beads of butter with the flour to make little discs. Your dough will look like this:
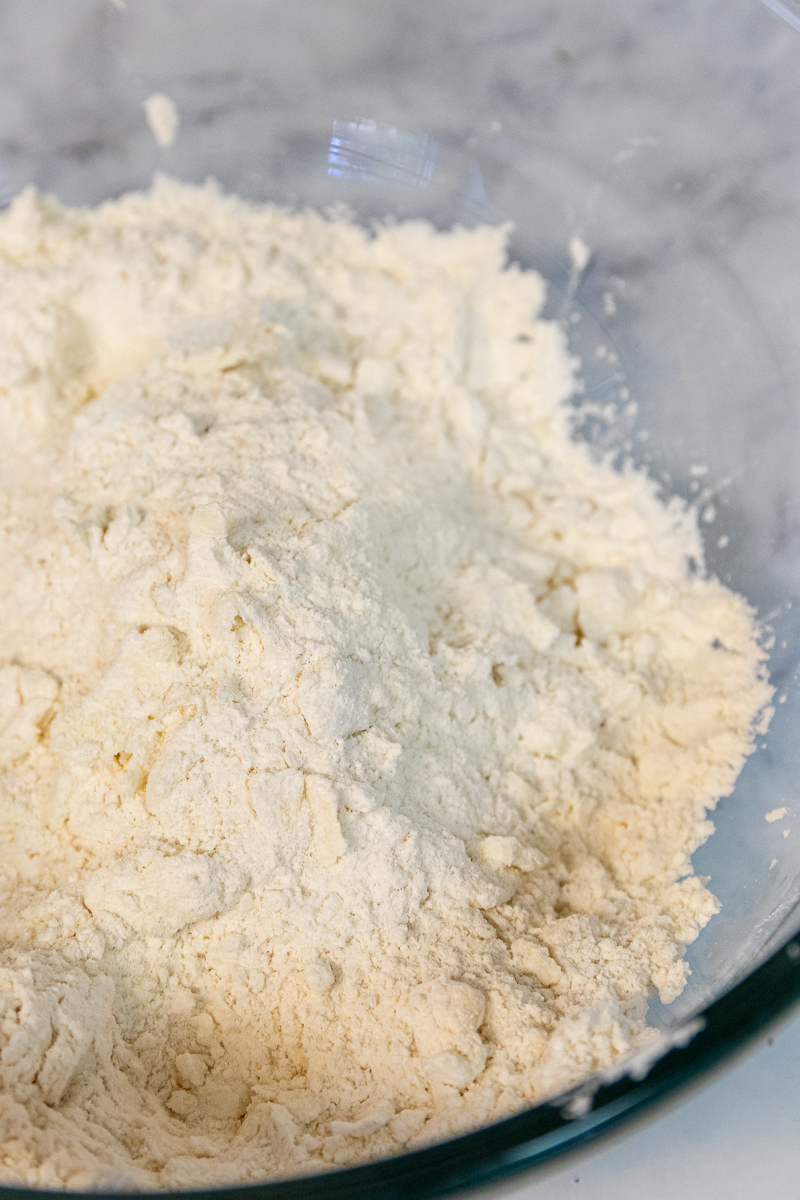

As you can see, it still looks pretty dry, and the butter hasn’t melted. You’re working quickly throughout this whole process. Now add the remaining butter and cut it into the flour using just a pastry cutter. This is where you’re looking for pea-sized chunks. If you’ve made pie crust before, this is what you normally do for all the butter. But the 2 step process makes a HUGE difference.
As you can see in the photo, your butter has 2 distinct textures. The mini “smeared” disc like pieces and the pea-sized cut pieces.

Add your vodka or lemon juice to the ice water, and start adding the water to your flour and butter mixture slowly. Start with 1/4 cup, and then add a tablespoon at a time. Stir it in with a fork.
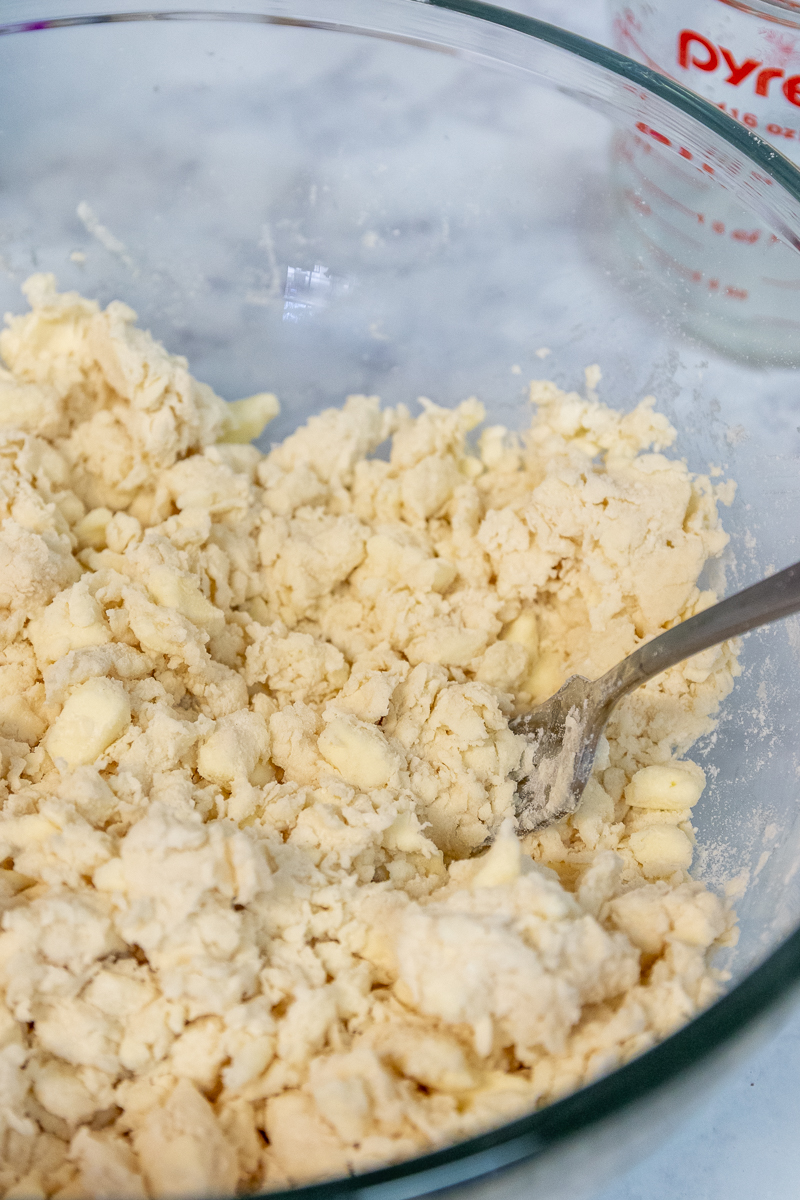

What you’re looking for is a dough that holds together when you pick up a piece and press it together. There should be no dry flour. A fork is the best way to mix this because it disrupts your cold butter pieces less than something like a wooden spoon or spatula.
Once your dough has enough liquid, divide it into two equal portions and press into discs. Wrap each in plastic wrap and refrigerate at least 30 minutes before using. Overnight is best, and you can make and refrigerate up to 3 days in advance. Or freeze for up to a month.
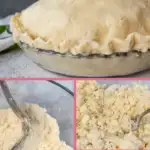
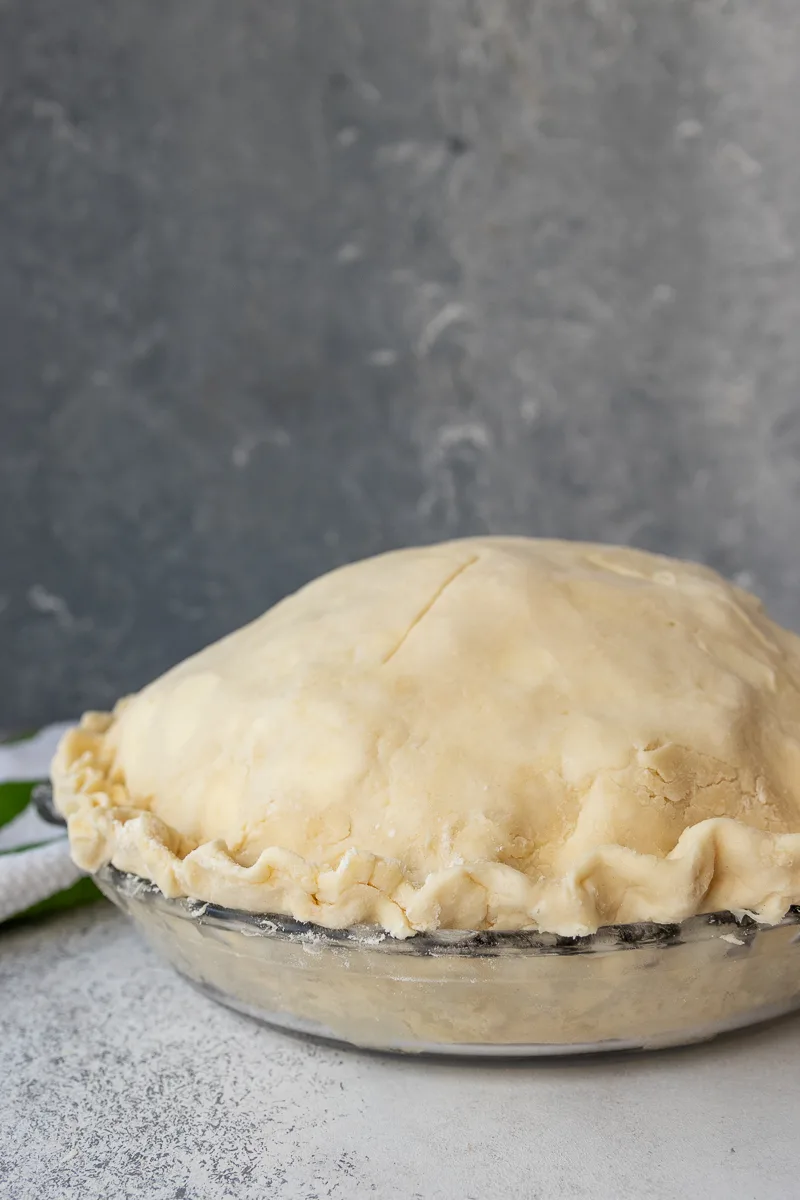
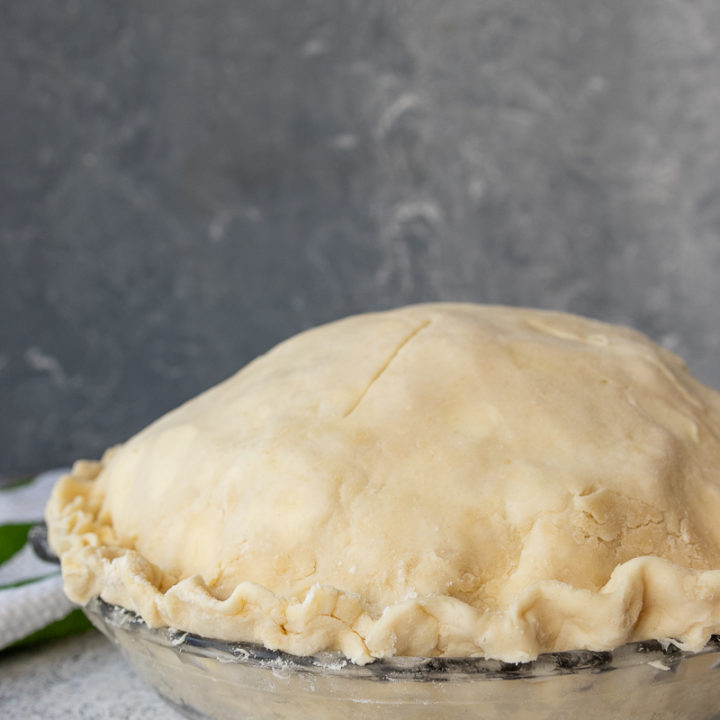
When you are ready to use, just remove your disc(s) and let them sit 5-10 minutes until cold but still workable. Place on a lightly floured surface and then roll out in a circular motion, always in the same direction. Rotate the dough a quarter turn frequently to keep it from sticking to the surface. Make sure to roll it out larger than your pie pan. You can trim the extra, but you don’t want to stretch it at all. If you stretch pie crust it will shrink when you bake. Bake according to the instructions in your pie recipe.
And if you want a good look at the gorgeous texture of the flaky all butter pie crust when baked, check this out:

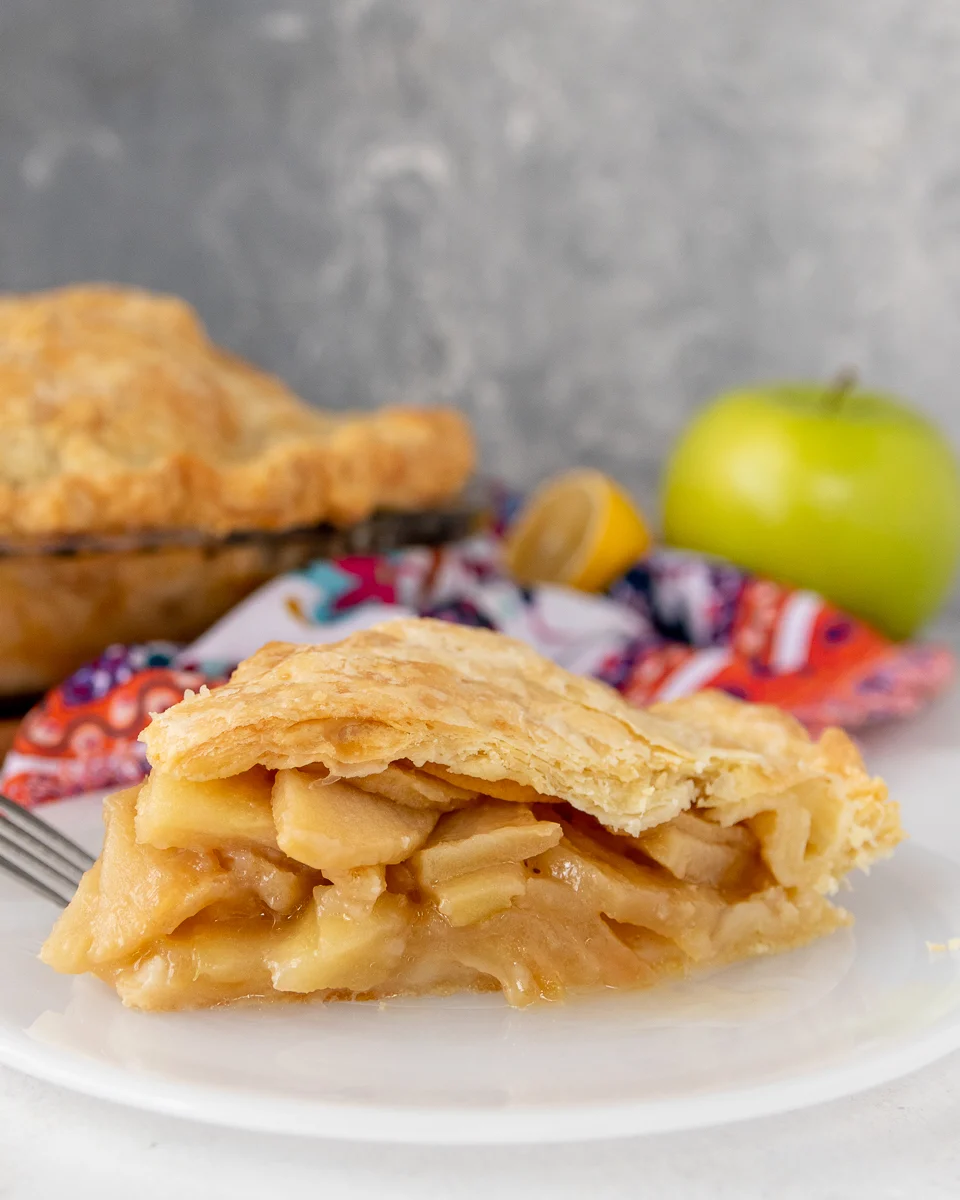
Gorgeous, isn’t it? Happy baking, darlings!
Flaky All Butter Pie Crust
Homemade pie crust with just a few ingredients you probably have on hand! This technique makes a flaky all butter pie crust that is tender and works for sweet or savory pies!
Ingredients
- 2 1/2 cups all purpose flour
- 1 teaspoon salt (see notes)
- 1/8 teaspoon baking powder
- 1 cup cold unsalted butter, cubed, divided
- 3/4 cup ice water
- 2 teaspoons lemon juice or vodka
Instructions
- Place half the cubed butter in the freezer.
- In a large mixing bowl, stir together the flour, salt, and baking powder.
- Sprinkle the other half of the cold butter cubes over the flour. Using just your finger tips, smear the butter and flour together until the butter is just coated and looks like small smeared discs.
- Remove the rest of the butter from the freezer and cut into the flour mixture until it resembles pea-sized chunks.
- Combine the water and lemon juice (or vodka). Add 1/4 cup to the flour and stir with a fork to combine. Add water 1 tablespoon at a time until there is no dry flour and a piece of the dough sticks together when you pick it up and press.
- Divide the dough into 2 equal portions. Press each into a disc and wrap in plastic wrap. Refrigerate at least 30 minutes before using, preferably overnight. You can make the pie crusts up to 3 days in advance and refrigerate. Freeze up to a month, and thaw overnight in the refrigerator before using.
- When you are ready to use your pie crusts, remove from the refrigerator and allow to sit at room temperature for about 5 minutes until workable, but still very cold. If you are making a double crust pie and using both discs, work with them one at a time to keep the dough as cold as possible.
- Unwrap the disc of dough and place on a lightly floured surface. Roll into a circle working in one direction only. Rotate the dough 90 degrees every few rolls to keep the circle even and prevent the dough from sticking. Roll your dough about 1 1/2 inches larger than your pie dish.
- Gently place the pie crust into your pie dish and guide it into the corners. Do not stretch the dough as it will shrink during baking.
- Bake the pie crust as called for in your recipe.
Notes
- If you are using salted butter, you can skip the salt in the recipe
Recommended Products
As an Amazon Associate and member of other affiliate programs, I earn from qualifying purchases.